Configure Google Single Sign-On (SSO) with Twilio Flex
Google single sign-on (SSO) lets users authorize third-party applications with their existing Google account, so they can log in without setting up a new account or creating a new set of credentials. This guide shows you how to configure Google SSO with Twilio Flex.
Before we connect Google to your Flex Instance, you have to configure a few steps in the Google Admin Console to ensure your app runs smoothly.
To log in a Flex user, you must pass three mandatory attributes to Flex in the SAML. Google provides email as an attribute out of the box but doesn't provide the roles or full_name attributes. You will need to configure these attributes yourself.
Warning
All the information supplied from the Identity Provider to Twilio is stored inside Twilio TaskRouter Worker Attributes. Consider local regulations for storing data and only provide data relevant for Flex usage. Learn more about Twilio's Privacy policy here.
-
Navigate to the User Schema page in your Google Admin Console.
-
Click on ADD CUSTOM ATTRIBUTE.
-
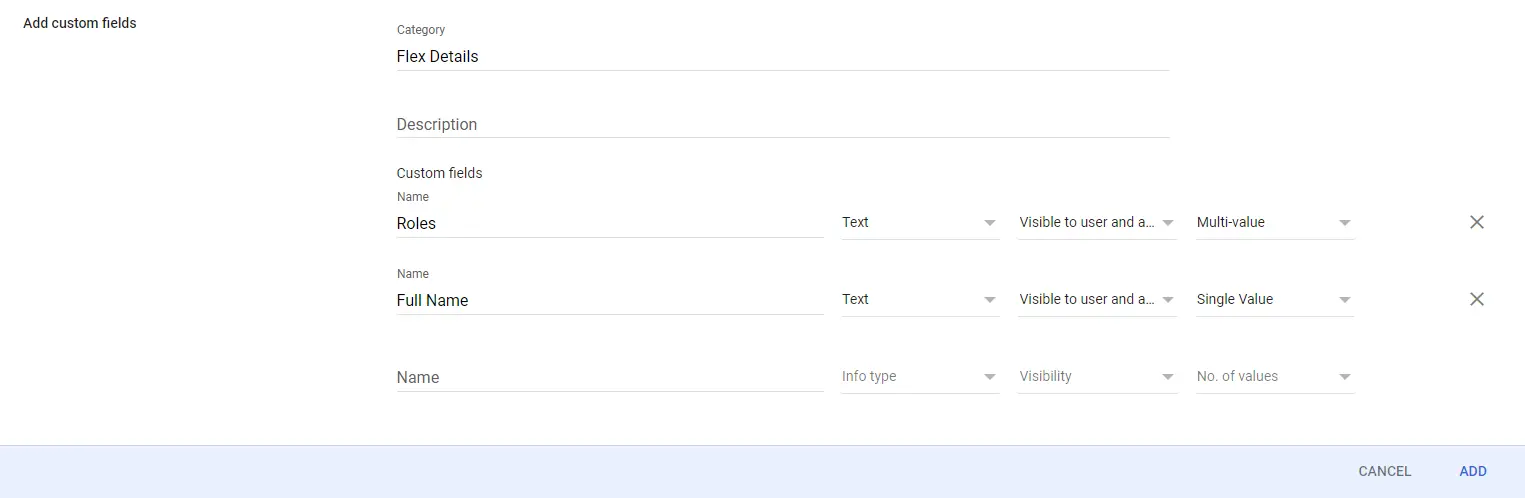
Enter "Flex Details" for Category.
-
Create the "Roles" and "Full Name" attributes below.
-
Click Add to save your custom attributes.
Optionally, you can add more attributes to accommodate the attributes needed by WFO (Workforce Optimization).
SAML apps allow you to use Single Sign-On to authenticate once with a single set of credentials. You can then access different secured applications without needing to authenticate with different credentials each time.
-
Navigate to Google Admin Console and click on Apps.
-
Click Web and mobile apps
-
Click on Add app > Add custom SAML app
-
Enter the App name, then click Continue.
-
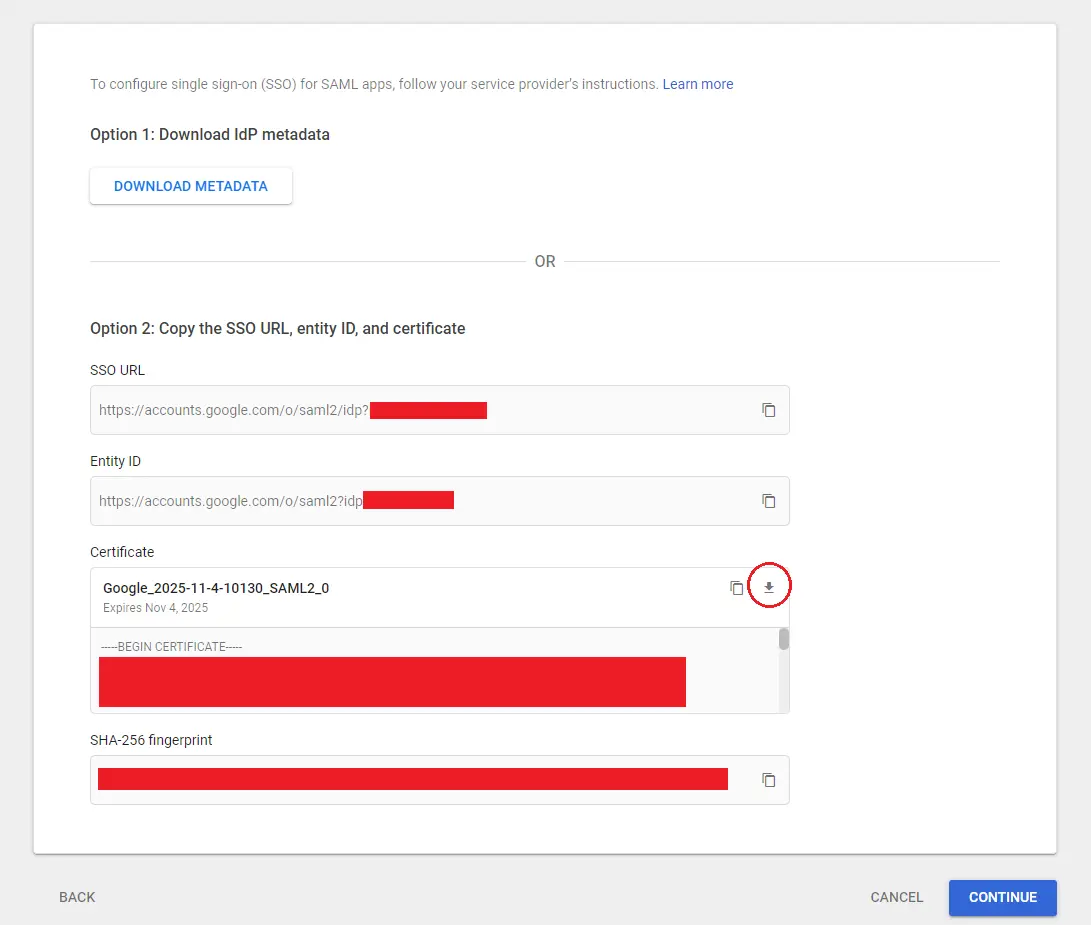
Copy your
SSO URLandEntity IDand save them somewhere - you'll need these later. -
Download your Certificate.
-
Click Continue to proceed over to the Service provider details step.
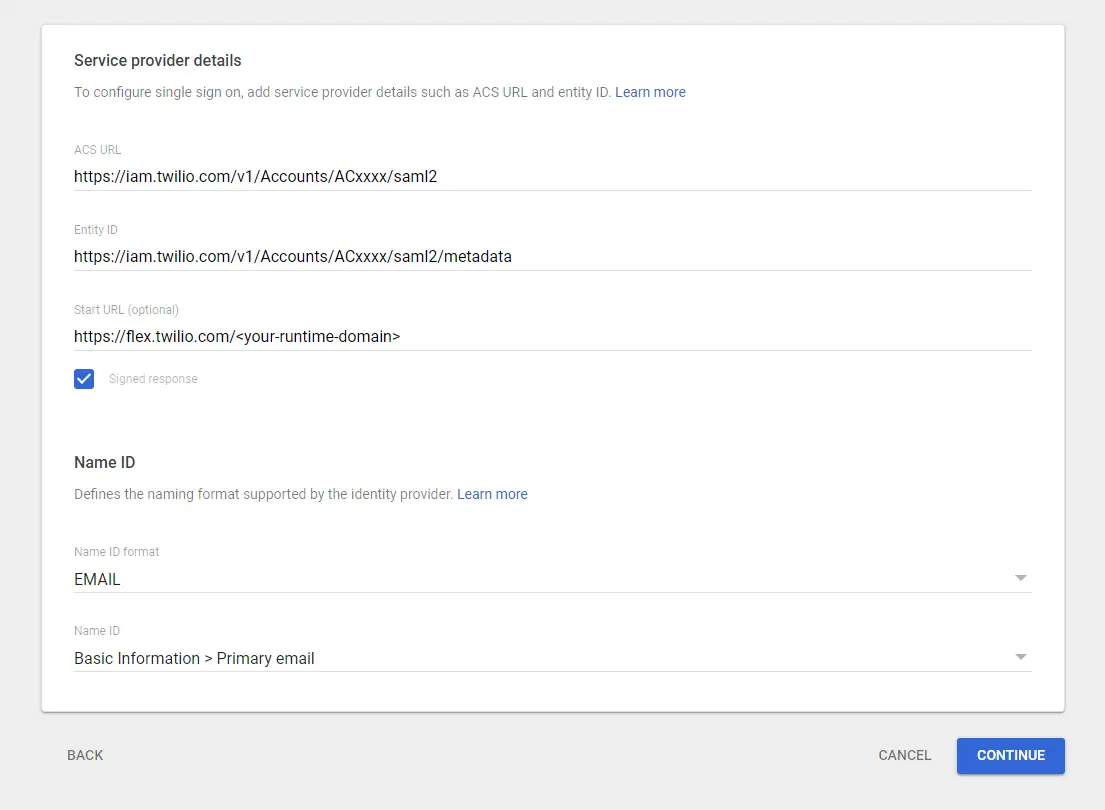
Next, we need to set up the Service Provider Details. Twilio Flex is the Service Provider in this instance.
| Setting | Value |
|---|---|
| ACS URL | Enhanced SSO configuration: Copy this value from the Set up your identity provider page, which provides the specific value for your account. Your value will look similar to this: https://login.flex.us1.twilio.com/login/callback?connection=JQxxxxLegacy SSO configuration: Make sure to replace the Account SID (ACxxxx) with your real Account SID. https://iam.twilio.com/v1/Accounts/ACxxxx/saml2 |
| Entity ID | Enhanced SSO configuration: Copy this value from the Set up your identity provider page, which provides the specific value for your account. Your value will look similar to this: urn:flex:JQxxxxLegacy SSO configuration: Make sure to replace the Account SID (ACxxxx) with your real Account SID. https://iam.twilio.com/v1/Accounts/ACxxxx/saml2/metadata |
| Start URL | https://flex.twilio.com/<your-runtime-domain>This Login Link is available on the Twilio Console SSO configuration page. |
| Signed Response | Checked! |
| Name ID Format | |
| Name ID | Basic Information > Primary Email |
Now we need to add attributes that will be passed from the SAML to Flex. Create the three required attributes (case sensitive) to pass to Flex and map them to the appropriate fields.
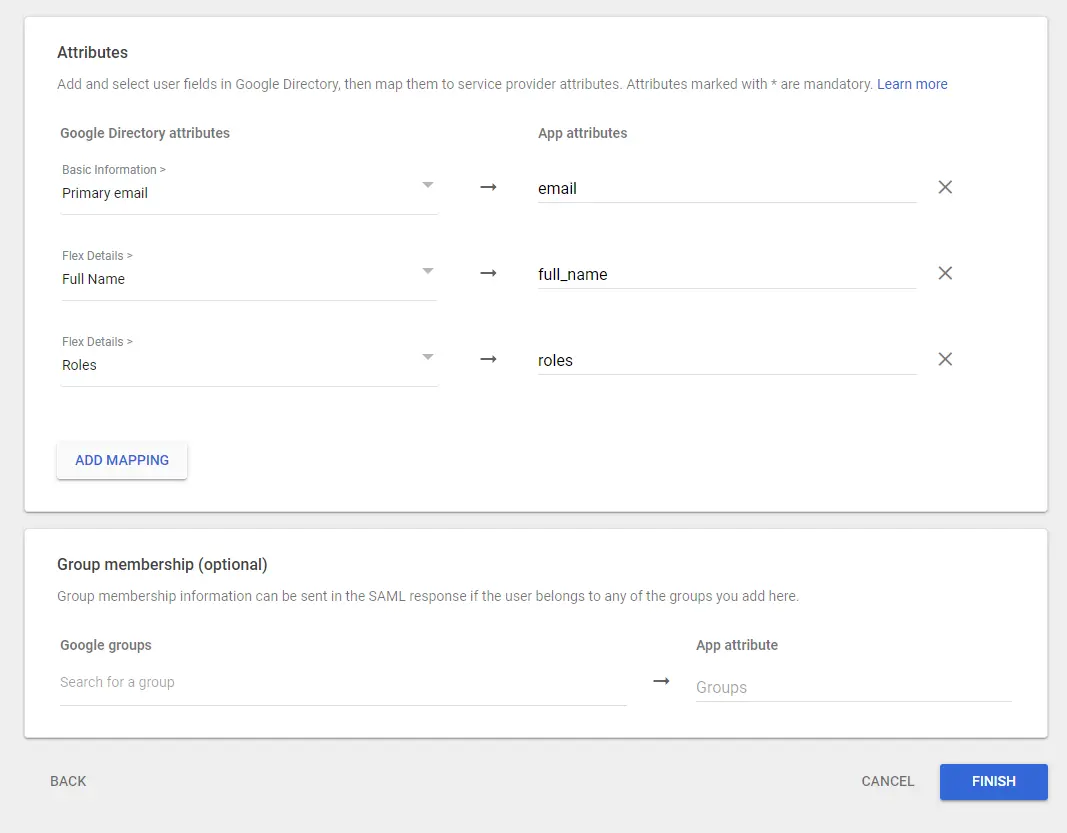
Note You need to ensure that you configured the Full Name and Roles attribute from Prepare your Google App environment. Otherwise, these attributes will not appear under the Google Directory attributes.
- Navigate to Google Admin Console and click on Users.
- Select a user and click on their User information section
- Scroll to Flex Details, the category name you set for the custom attributes during Step 4 in Prepare your Google App environment.
- Click on the edit icon and add your roles. The current options are
agent,admin, andsupervisor.
Now that you've configured your app, you must:
- Verify your domain if you haven't already. See Verify domain ownership.
- Enable your SAML app. See the Turn on your SAML app section on Set up your own custom SAML application.
Grab the URLs you copied from Step 5 in Create a custom SAML app, and configure SSO in Flex Console on the Single sign-on (SSO) page. Be sure that the Twilio SSO URL field matches the value you provided in Google for ACS URL.
| Setting | Value |
|---|---|
| Friendly Name | Anything you want |
| x.509 Certificate | Open the .pem file you downloaded above in your favorite text editor and copy/paste the entire contents of the file including all dashes. |
| Identity Provider Issuer | Google's Entity ID (see above) |
| Single Sign-On URL | Google's SSO URL (see above) |
| Default Redirect URL | https://flex.twilio.com/<your runtime domain>This Login Link is available at the top of the active SSO configuration page. |
| Trusted domains | Add any trusted domains that can be used for login requests. Your Default Redirect URL is automatically included. |
| Login using popup | Optional. When selected, the login page for your identity provider appears in a dedicated popup window. If you are loading Flex within the iframe of another application, you may need to select this option. |
Our Configuring SSO page has additional details on how to initiate login from your Identity Provider, how to login to a self-hosted domain, and details on attributes that can be defined for each identity.
Navigate to the Google SSO IdP URL (see above) in incognito mode and log in. Google should redirect you to Flex, where you can authenticate using your Google account.