Assets
Twilio Assets is a static file-hosting service that lets you quickly upload and serve files needed to support your applications. You can host your files that support web, voice, and messaging workflows. Common use cases include:
- Hosting
.mp3audio files used in TwiML and Studio Flows. - Serving images sent through MMS.
- Storing configuration files used by Twilio Functions.
Twilio provides you with three different types of Assets: public, protected, and private. The primary difference between the types is how they are accessed:
- Public Assets are served over HTTPS from the Twilio CDN to ensure high availability and security, and are accessible to anyone with the Asset URL. Ensure that you carefully consider the data you include in a public Asset.
- Protected Assets are also accessible through the Twilio CDN by URL. However, they require a valid Twilio request signature. If the request doesn't have a valid signature, the service returns a
403error. - Private Assets are not accessible by URL or exposed to the web. Instead, they're packaged with your Twilio Functions at build time.
For more details on Asset visibility, see the Visibility documentation, which explains the differences between public, protected, and private Assets.
Metadata warning
When you upload Asset files, all the metadata is saved along with them. For example, if your image files have EXIF metadata, this information stays with the image. If you share these files, the metadata remains intact and is not altered or removed by the Assets product.
In the Twilio Console, open one of your existing Services or creating a new one. When you are in the Functions Editor UI for your Service, note the following three areas:
- The Assets pane: This lists your Assets, their Visibility, a context menu for adjusting visibility, and another menu for other actions.
- The Add + button: This lets you upload files as Assets or create a new Asset.
- The Deploy All button: This uploads and deploys your Assets (along with any Functions).
To upload an Asset, click Add + then Upload File. Once you've selected a file, set the visibility of each Asset. Click Upload to upload the selected file(s) with your desired settings.
As the Asset uploads, it is not immediately accessible through a URL or in your Functions yet. A gray circle next to the Asset's name indicates this state. To deploy the Asset (and the rest of your service), click Deploy All. Once deployed, a green check icon appears next to each deployed Asset.
To construct an Asset URL, take the service URL, for example https://example-1234.twil.io, and append the name of your Asset. An Asset such as, example.json, is accessible at https://example-1234.twil.io/example.json.
To copy an Asset URL to your clipboard:
- Click ⋮, then Copy URL.
- Open the Asset in the Functions Editor, and click Copy URL.
Public Assets are accessible to anyone with the Asset URL once deployed. For example, if your service is hosted at https://example-1234.twil.io and has a public Asset named ahoy.mp3, the Asset is available at https://example-1234.twil.io/ahoy.mp3.
The URL of a protected Asset is created the same way as a that of a public Asset. However, a protected Asset is only accessible from Twilio code, such as a Function, a Studio Flow, or Flex.
For example, you deploy an image named grumpy.jpg to https://twilio-assets-1967.twil.io/grumpy.jpg, and want to send this image to users as part of an MMS, but don't want it to be accessible via URL. When you deploy following code to a function in the same service and execute it, only the intended recipients receive the image. Anyone who tries to access the file through the URL receives a 403 Forbidden error instead.
1exports.handler = async (context, event, callback) => {2// Access the NodeJS SDK by calling context.getTwilioClient()3const client = context.getTwilioClient();4// Query parameters or values sent in a POST body can be accessed from `event`5const from = event.From || "+15017122661";6const to = event.To || "+15558675310";7const body = event.Body || "Ahoy, World!";89try {10const message = await client.messages.create({11to,12from,13body,14// You will get a 403 if you try to view this image, but Twilio will15// be able to access it and send it as part of the outgoing MMS16mediaUrl: "https://twilio-assets-1967.twil.io/grumpy.jpg",17});18console.log(`Success! MMS SID: ${message.sid}`);19return callback(null, message.sid);20} catch (error) {21console.error(error);22return callback(error);23}24};
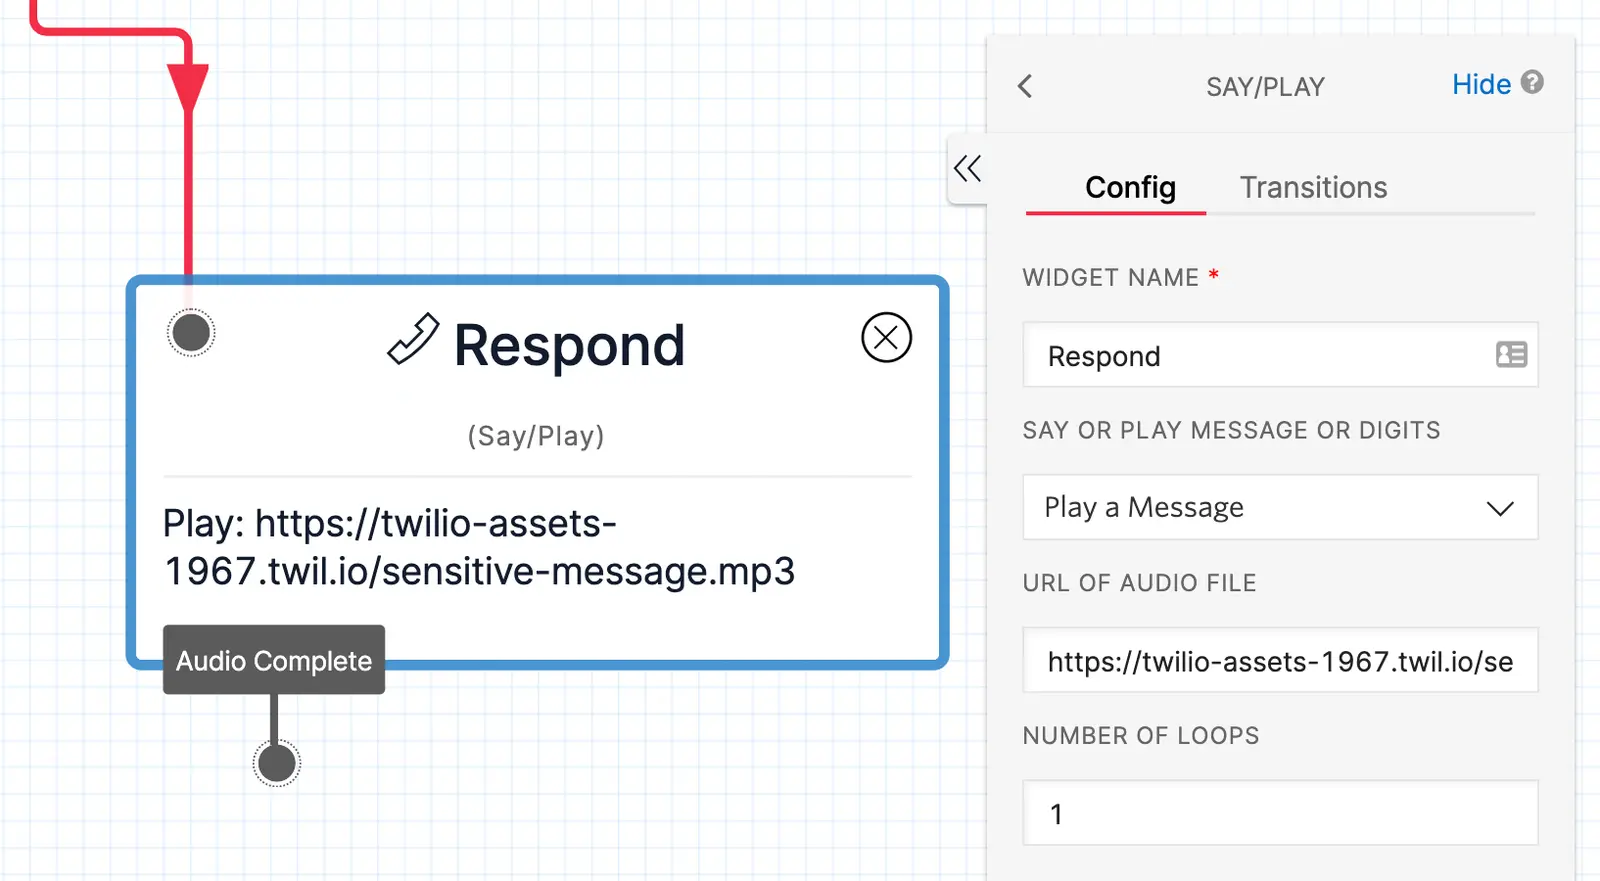
If you have an audio file to include in a Studio Flow, but don't want the file to be publicly accessible, you can upload it as a protected Asset. Reference the URL in a Studio Say/Play widget to play the audio only for users that reach that part of your Flow. An example protected Asset deployed at https://twilio-assets-1967.twil.io/sensitive-message.mp3 can be referenced in your Studio Flow as follows:
When Twilio builds your function for deployment, it bundles every private Asset you've uploaded. This makes private Assets well-suited for storing sensitive configuration files, templates, and shared code that supports your application.
To access a private Asset, use the Runtime.getAssets method and open the file with either the open helper method or the fs module, as shown in the following examples.
Example of how to read the contents of a private Asset.
1exports.handler = (context, event, callback) => {2// Access the open helper method for the Asset3const openFile = Runtime.getassets()["/my_file.txt"].open;45// Open the Private Asset and read the contents.6// Calling open is equivalent to using fs.readFileSync(asset.filePath, 'utf8')7const text = openFile();8console.log("Your file contents: " + text);910return callback();11};
Example of how to serve an audio file from a private Asset.
1// Load the fs module2const fs = require("fs");34exports.handler = (context, event, callback) => {5// Get the path to the Private Asset6const mp3Path = Runtime.getassets()["/audio.mp3"].path;78// Read the file into the buffer and get its metadata9const buffer = fs.readFileSync(mp3Path);10const stat = fs.statSync(mp3Path);11// Create a new Response object12const response = new Twilio.Response();13// Send the audio file in the response14response.setBody(buffer);15response.appendHeader("Content-Type", "audio/mpeg");16response.appendHeader("Content-Length", stat.size);1718return callback(null, response);19};
In some cases, such as hosting an app with a landing page, you want the root URL of your service to return an Asset in the browser. For example, root-asset-5802.twil.io/ serves static HTML solely from Assets.
To reproduce this behavior, use one of two special paths for a public Asset for your file (HTML, an image, or any other file type).
If you rename an Asset's path to /, the service delivers the Asset when a user requests the root URL.
This path only applies to HTML files. Renaming an HTML file's path to /assets/index.html instructs the service to return that page when a user requests the root URL of your service.
Try this with the following index.html sample:
1<!DOCTYPE html>2<html lang="en">3<head>4<meta charset="UTF-8" />5<meta name="viewport" content="width=device-width, initial-scale=1.0" />6<meta http-equiv="X-UA-Compatible" content="ie=edge" />7<title>Hello Twilio Serverless!</title>8</head>9<body>10<header><h1>Hello from Twilio Serverless!</h1></header>11<main>12<p>13This page is a public Asset that can be accessed from the root URL of this service.14</p>15</main>16<footer>17<p>18Made with 💖 by your friends at19<a href="https://www.twilio.com">Twilio</a>20</p>21</footer>22</body>23</html>
Deploying a root Asset with the Serverless Toolkit
To deploy a root Asset using the Serverless Toolkit instead, you need to create the /assets/index.html path inside the existing assets/ folder that exists for your project.
The resulting path in your local filesystem will be /assets/assets/index.html, and the folder hierarchy will be as follows:
1.2├── assets3│ └── assets4│ └── index.html5├── functions6└── package.json
All builds have limits on the maximum file size and quantity of each Asset type:
| Asset type | Maximum size | Quantity |
|---|---|---|
| Public | 25 MB | 1000 assets |
| Private | 10 MB | 50 assets |
| Protected | 25 MB | 1000 assets |
These limits only apply to individual Builds. Assets used in a Build by a subaccount don't affect the limits of other subaccounts or the main account.
Using Environments further expands your options, as you can create Builds that contain different sets of Assets and deploy them to separate Environments.
Asset limits warning
When you use the Serverless API (either directly through the SDKs, or through the CLI), you can create more Assets and Asset versions within a service. For example, to have different Assets in different Environments. A specific Build, however, can only include so many Assets, as described in the Limitations table.
The Console UI doesn't support this flexibility. Every Asset listed in the UI is included in the deployed Build, and you cannot upload Assets that exceed the stated limits.