Storing into AWS S3
You can write your Video Recordings and Compositions to your Amazon Web Services (AWS) S3 bucket, rather than Twilio's cloud.
Warning
Once you activate external S3 storage, Twilio will stop storing Programmable Video audio/video recordings into the Twilio cloud. It will be your responsibility to manage the security and lifecycle of your recorded content.
Use this feature when you need to meet compliance requirements that exclude reliance on third-party storage.
Video Recordings and Video Compositions have separate S3 storage settings that you can configure independently per account.
You can't compose Recordings stored in AWS S3 because Twilio needs direct access to create the Composition. To compose your Recordings, store them in Twilio's cloud. After you create the Composition, you can permanently delete the original Recordings using the Twilio Video Recordings API.
To configure external S3 storage, you will need the following:
- The AWS S3 bucket URL: The URL for the AWS S3 bucket.
- The AWS credentials: The access key ID and secret access key for an AWS Identity and Access Management (IAM) user with write access to the bucket.
Amazon Simple Storage Service (Amazon S3) lets you store and retrieve data from anywhere on the web. In Amazon S3, objects are stored into "buckets". Buckets are virtual folders where objects can be written, read, and deleted.
Follow the AWS instruction to create a general-purpose bucket. Twilio does not require any specific bucket configuration. You can use any bucket configuration that works for your application.
Note down the following details:
bucket-name: Must follow the DNS naming rules.bucket-region: The AWS region where your S3 bucket is located.
Follow the AWS instructions to access your bucket. We recommend that you use the virtual-host-style URL based on the scheme:
https://bucket-name.s3-aws-region-code.amazonaws.com
Replace bucket-name with your bucket name and aws-region-code with the AWS region code corresponding to your bucket-region. To find your aws-region-code, see the AWS region code list.
After completing this step, you should have an AWS S3 Bucket URL like the following example:
https://my-new-bucket.s3-us-east-2.amazonaws.com
You can use IAM to control access to your AWS services and resources. You need to create an IAM user that can access your AWS resources.
Follow the AWS instruction to create an IAM user.
In the IAM console, do the following:
- For Access type, select Programmatic access.
- Under Permissions, select Attach existing policies directly and click the Create policy button to configure the user permissions.
Choose the JSON editor and create a policy document with write permissions. You can use the following JSON snippet as a template for the policy document.
Replace my_bucket_name with your actual bucket-name, and /folder/for/storage/ with the path where you want Twilio to store your recordings within your bucket.
For your specified path:
/is a valid path.- Make sure to include the
*wildcard at the end.
After creating the policy, return to the original browser tab and click Refresh to see the policy you created. You can then select it and complete the IAM user creation.
1{2"Version": "2012-10-17",3"Statement": [4{5"Sid": "UploadUserDenyEverything",6"Effect": "Deny",7"NotAction": "*",8"Resource": "*"9},10{11"Sid": "UploadUserAllowPutObject",12"Effect": "Allow",13"Action": [14"s3:PutObject"15],16"Resource": [17"arn:aws:s3:::my_bucket_name/folder/for/storage/*"18]19}20]21}
After the user is created, Amazon provides you its credentials. This includes:
- Access key ID
- Secret access key
Store these values securely for later use along with the S3 path where you granted Twilio write permissions (for example, /folder/for/storage/).
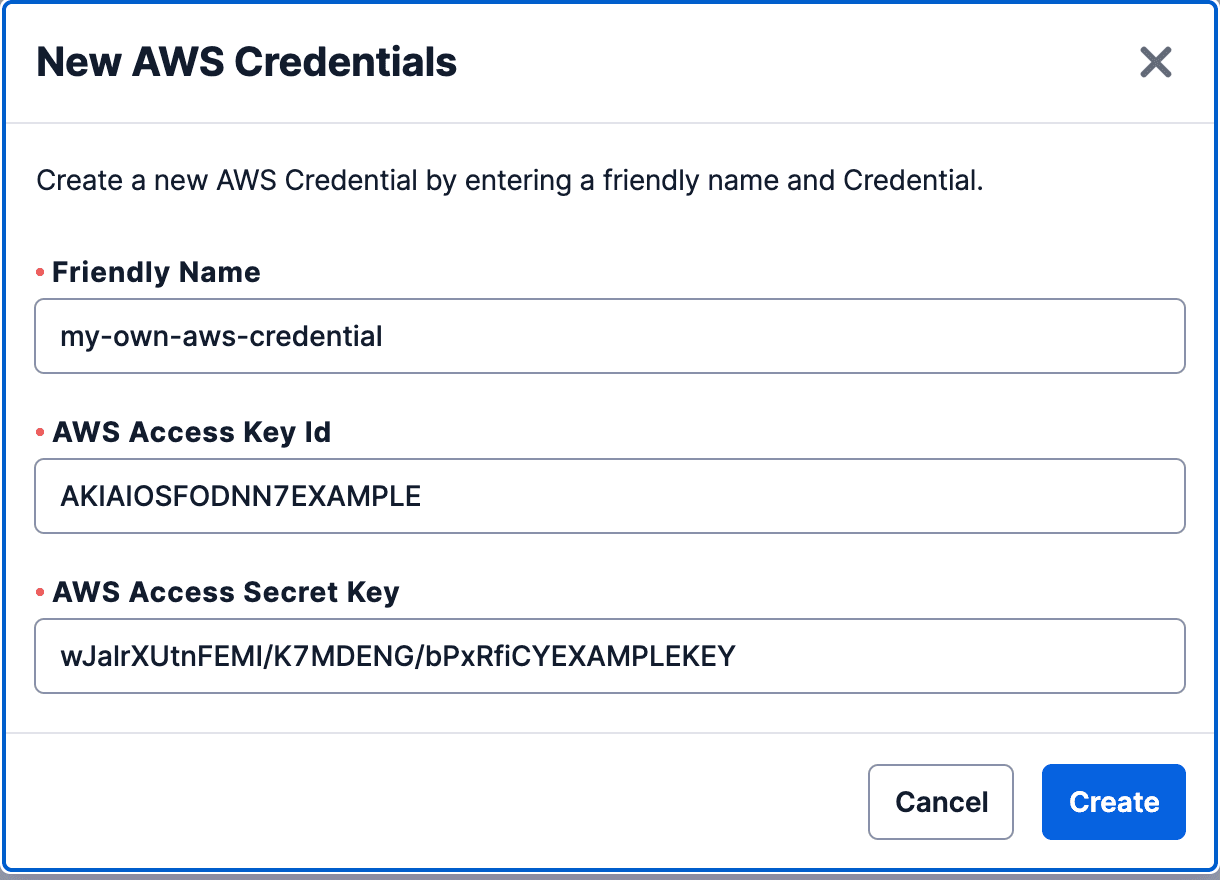
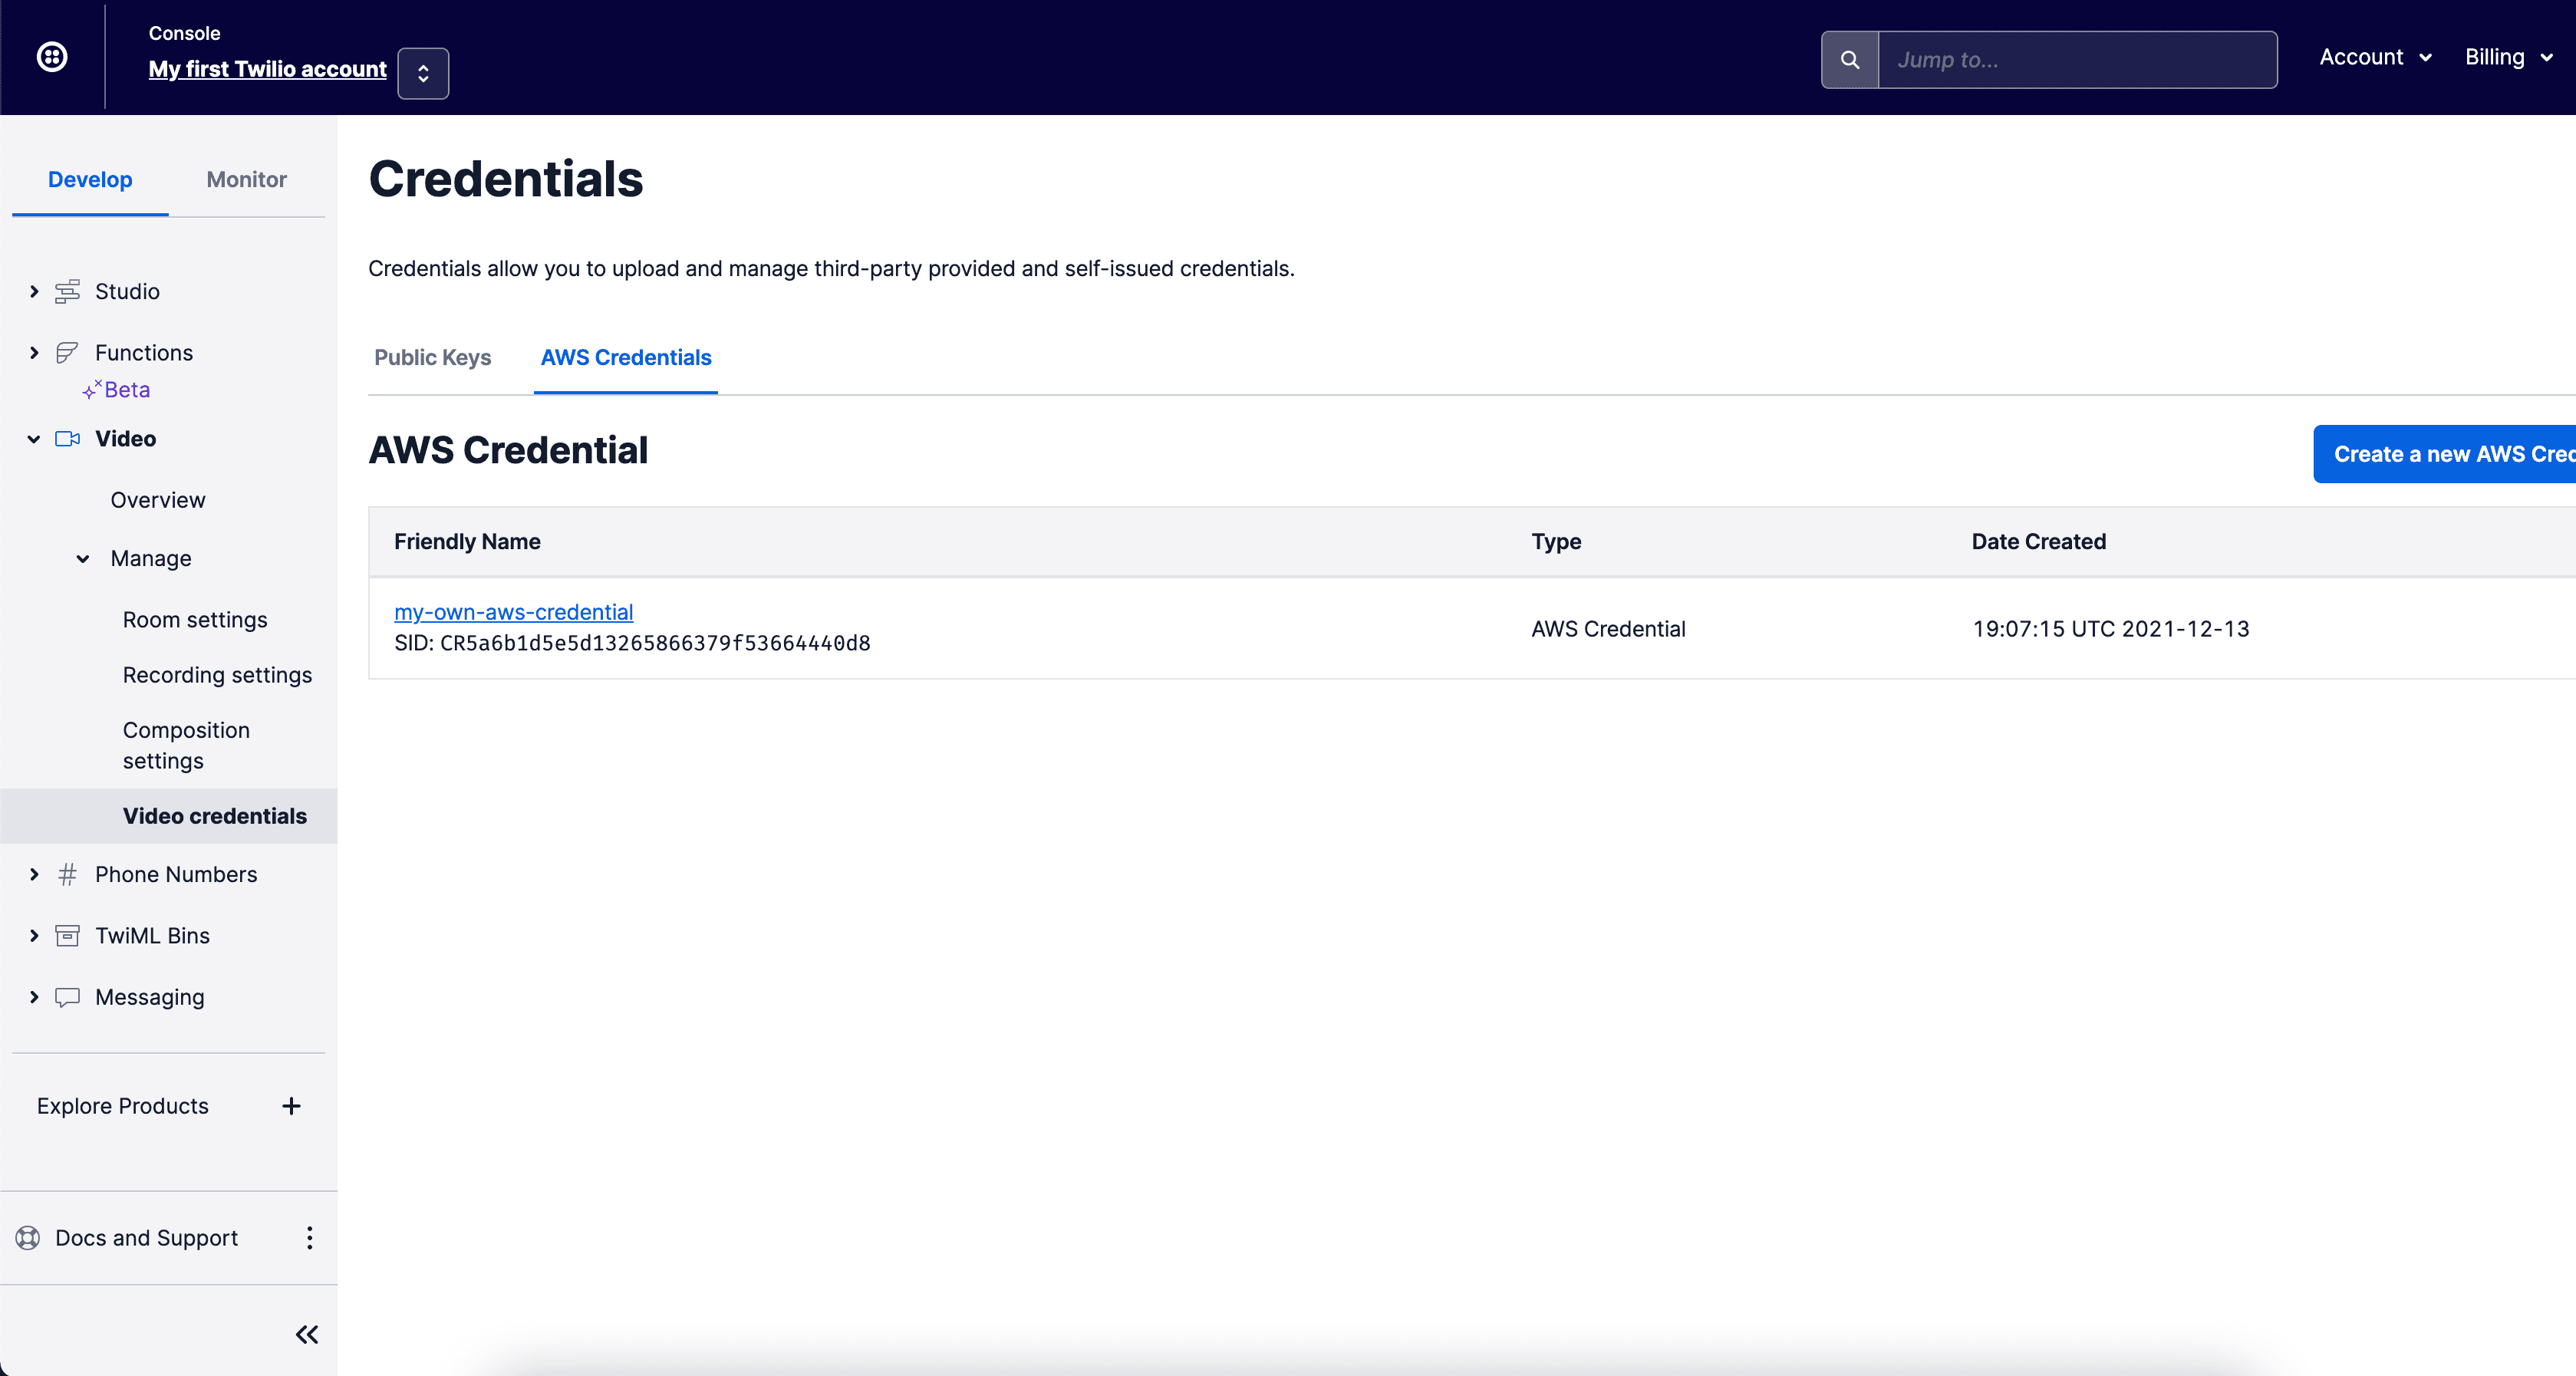
- Go to the Twilio Console AWS Credentials page and click Create new AWS Credential.
- On the popup that opens, provide the Friendly Name you want, along with your IAM user's AWS Access Key Id and the AWS Access Secret Key, then click Create.

- On the Credentials page, find the AWS credential you just created. Note down the AWS Credential SID that has the format
CRxx.

Info
When you activate this feature in either Recordings or Compositions, a .txt test file is created into your bucket. Twilio uses that file to verify that the write permissions you provided are working. You can remove the file safely if you want.
You have two options to enable Recordings S3 storage.
Option 1: Enable S3 Recordings storage using the Twilio Console
- Open the Twilio Console for your account or project.
- Go to Video > Manage > Recording settings.
- Enable External S3 Buckets and specify the AWS Credential you created and the AWS S3 Bucket URL.
- Click Save.
All recordings created thereafter will be stored in the specified S3 bucket.
Option 2: Enable S3 Recordings storage using the Recording Settings API
You can use the Twilio Recording Settings API to store recordings in an external AWS S3 bucket.
You have two options to enable Compositions S3 storage.
Option 1: Enable S3 Compositions storage using the Twilio Console
- Open the Twilio Console for your account or project.
- Go to Video > Manage > Composition settings.
- Enable External S3 Buckets, select the AWS credential, and enter the External S3 Bucket URL.
- Click Save.
All compositions created thereafter will be stored in the specified S3 bucket.
Option 2: Enable S3 Compositions storage using the Recording Settings API
You can use the Twilio Composition Settings API to store compositions in an external AWS S3 bucket.
Amazon S3 buckets support SSE, which encrypts all data written to disk at the object level.
To store your Twilio Recordings and Compositions in an encrypted S3 bucket, you must use SSE with AWS KMS keys (SSE-KMS ).
To use SSE-KMS with Twilio, you must grant access to the KMS key in your policy document. When updating your policy document, do the following:
- Replace the
ResourceARN parameter inUploadUserAllowPutObjectwith the targetbucket-nameand path, see Create a custom policy for more details. - Replace the
ResourceARN parameter inAccessToKmsForEncryptionwith the actual KMS ARN using the syntax specified in the official AWS documentation. - Make sure that the KMS key and the bucket are in the same region. Learn more about AWS Key Management Service.
The following example shows how to configure the policy:
1{2"Version": "2012-10-17",3"Statement": [4{5"Sid": "UploadUserDenyEverything",6"Effect": "Deny",7"NotAction": "*",8"Resource": "*"9},10{11"Sid": "UploadUserAllowPutObject",12"Effect": "Allow",13"Action": [14"s3:PutObject"15],16"Resource": [17"arn:aws:s3:::my_bucket_name/folder/for/storage/*"18]19},20{21"Sid": "AccessToKmsForEncryption",22"Effect": "Allow",23"Action": [24"kms:Encrypt",25"kms:Decrypt",26"kms:ReEncrypt*",27"kms:GenerateDataKey*",28"kms:DescribeKey"29],30"Resource": [31"arn:aws:kms:region:account-id:key/key-id"32]33}34]35}
Twilio Video S3 bucket names can include only 7-bit ASCII characters. Non-ASCII characters, such as ü, ç, and é, aren't permitted.