Send Appointment Reminders with Twilio Studio
Appointment reminders are a breeze with Twilio Studio! Let's look at how to build a Flow that hooks into your application via REST API and sends a reminder SMS with a confirmation message.
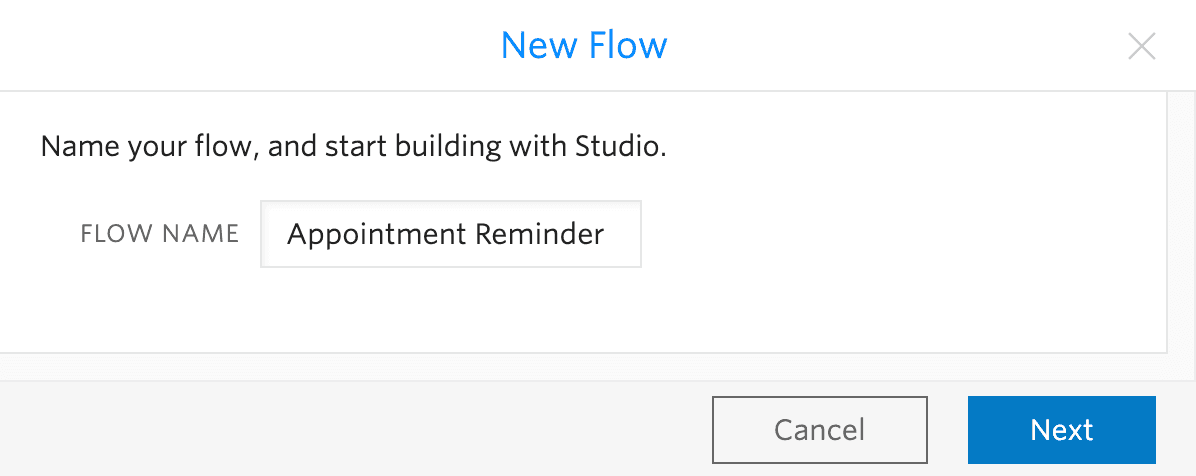
We'll start with a fresh Twilio Studio Flow. Log into your Twilio account and navigate to the Studio Dashboard, then tap the + icon to create a new Flow. You can name your Flow anything you like — this guide will use Appointment Reminder. Click on the Next button.
You'll notice that the Studio Canvas comes with a widget already in place. The Trigger (Start) widget starts the Flow when the trigger you specify is fired. In this case, the REST API trigger will be used to start the Flow's Execution. See the REST API section of the Studio User Guide to learn how to make these calls.
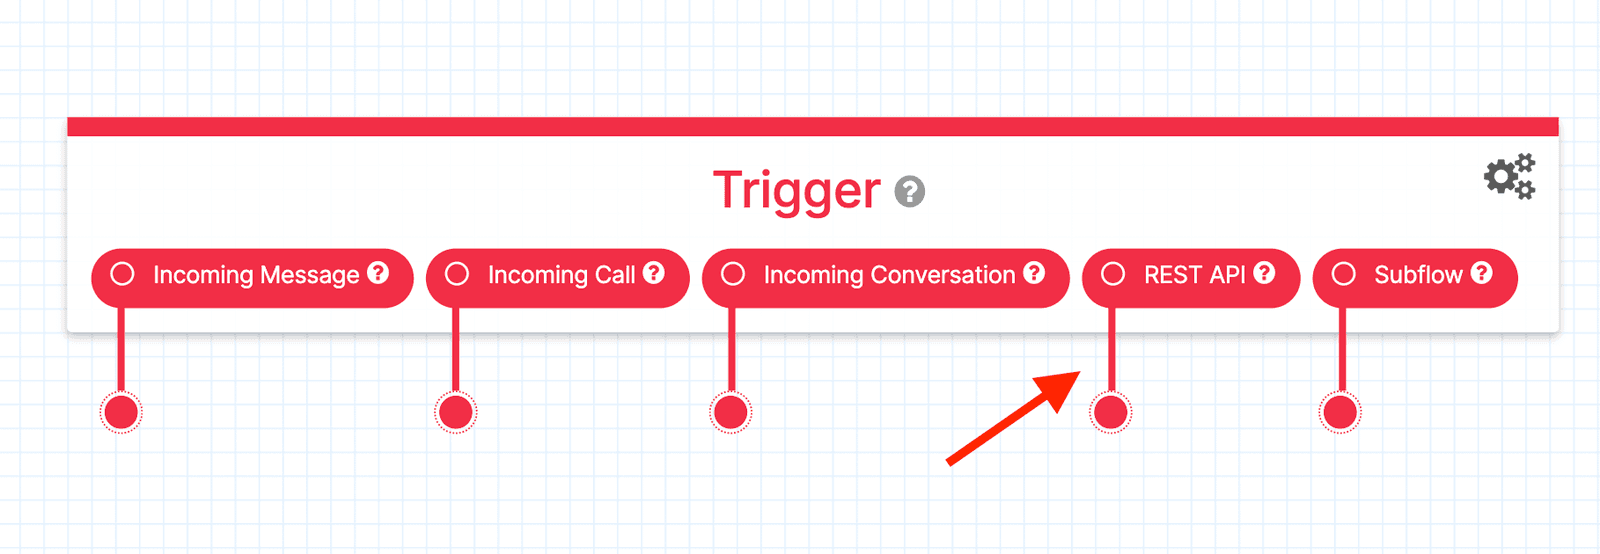
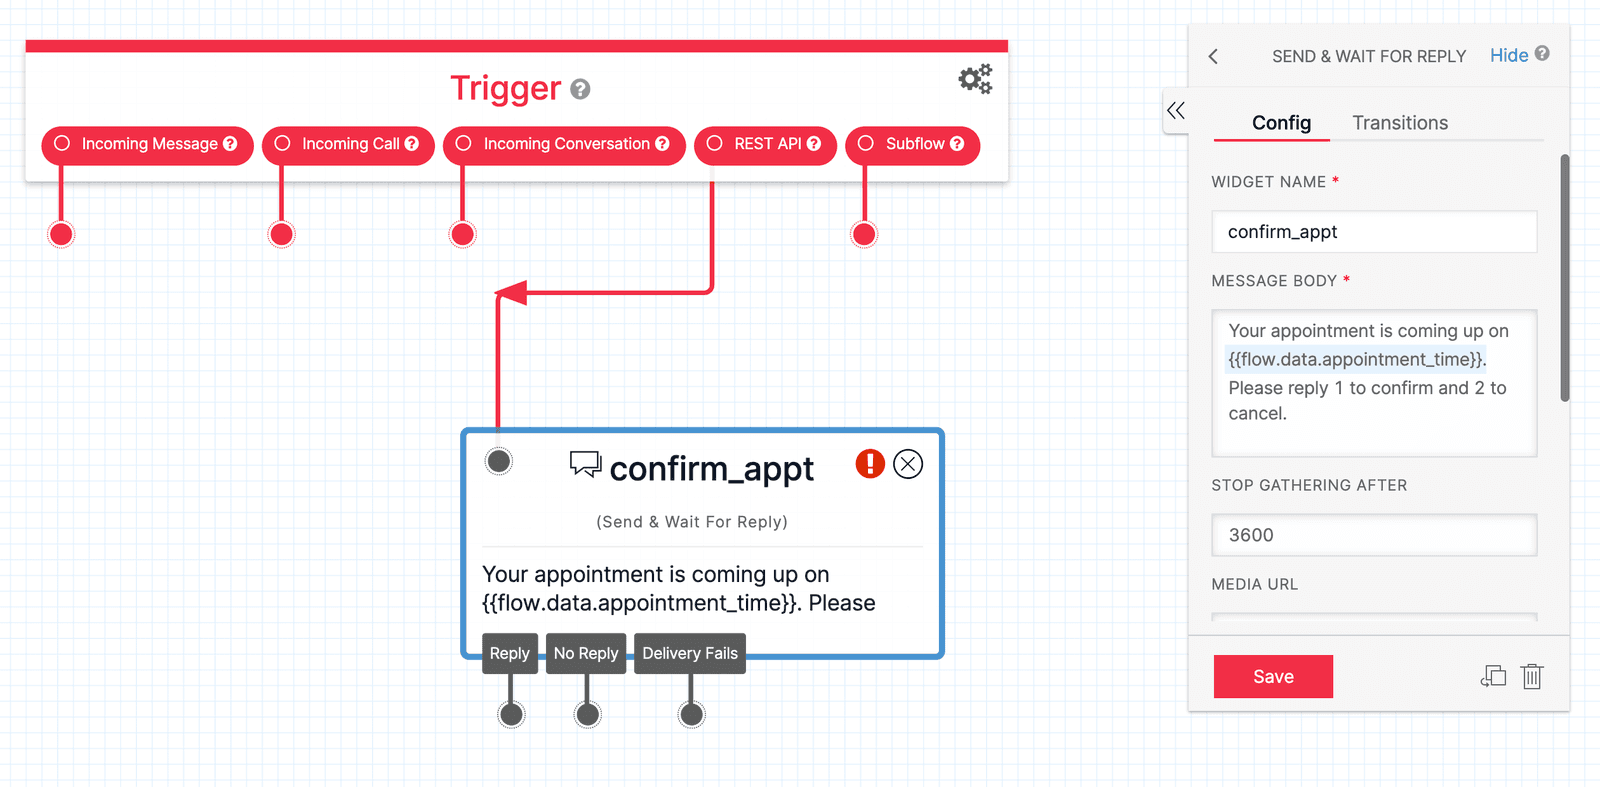
Start by adding a Send & Wait For Reply widget to the Canvas and connecting it to the REST API trigger by dragging the red dot to the grey dot in the corner of the new widget. You can use this widget to send an SMS to the user and wait for a response message. In this case, you will use a value (time) that was passed in using the REST API trigger. You can reference values passed in from a REST API trigger using the Liquid variable {{flow.data.<valueName>}}.
Under the MESSAGE BODY field of the widget, input "Your appointment is coming up on {{flow.data.appointment_time}}. Please reply 1 to confirm and 2 to cancel." Studio supports the Liquid template language, which is a fancy way of saying "a way to help you load dynamic content throughout your Flow." You are telling Studio that you would like it to dynamically interpret the text between the two curly braces based on something. In this case, the appointment_time value that was passed in from your REST API request will be dynamically interpreted.
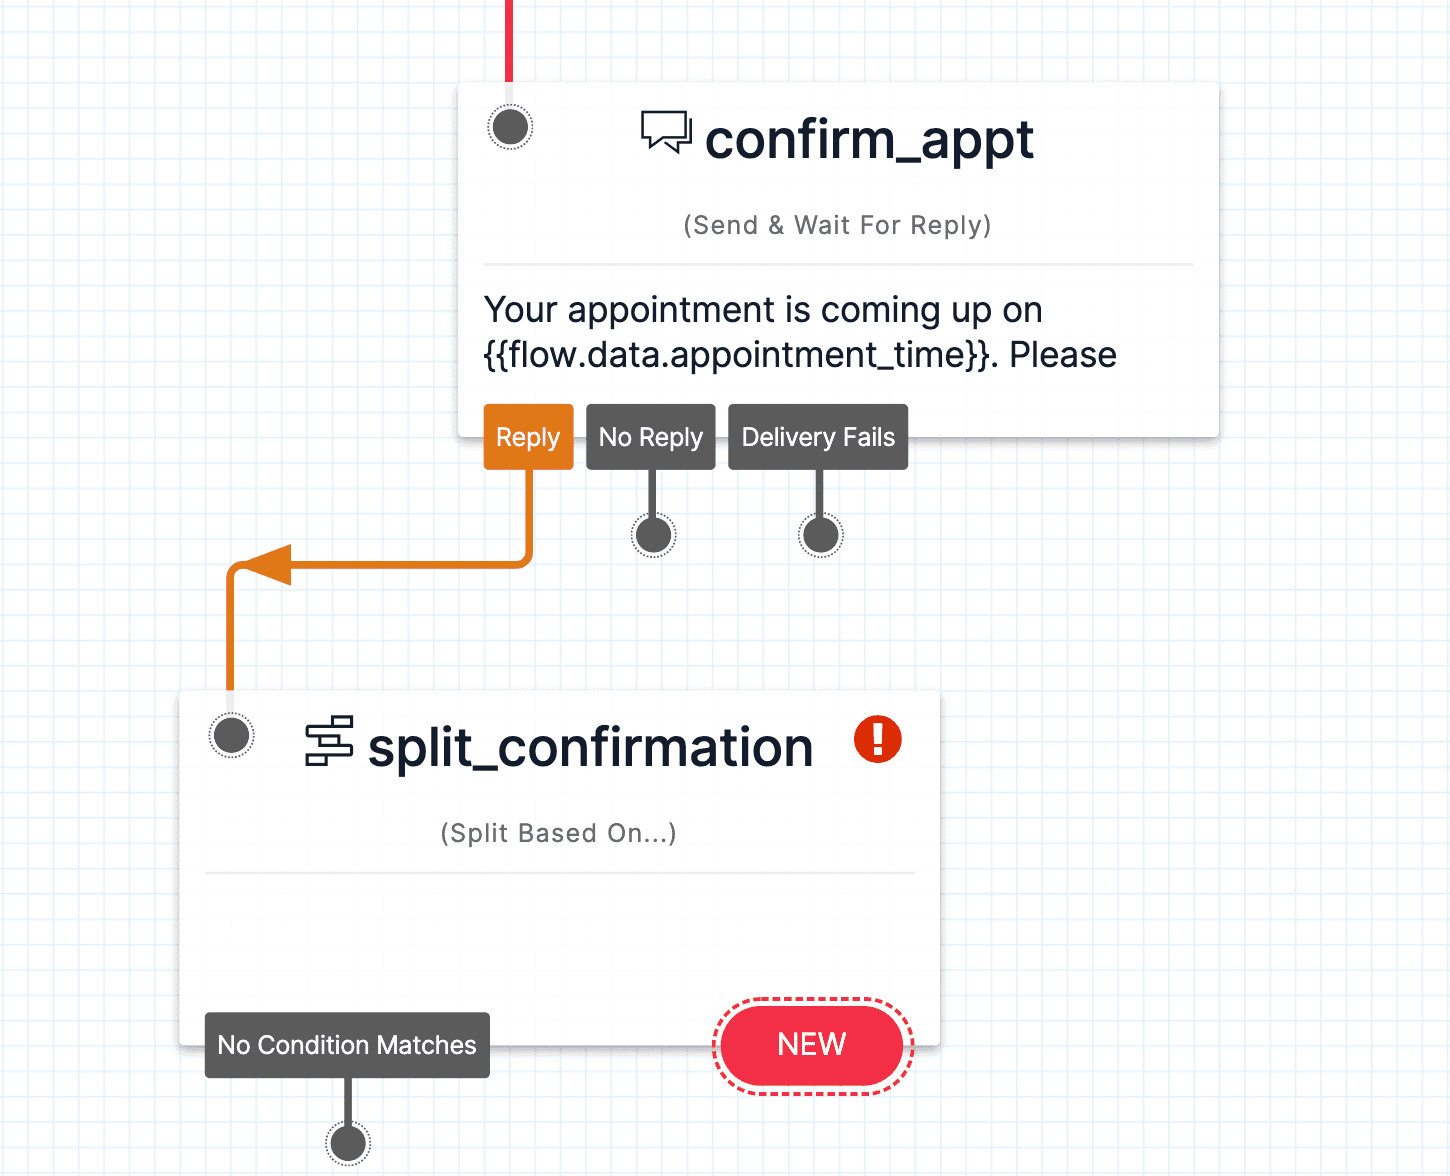
Assume the user replies to the text message to confirm or cancel their appointment. You need to add some logic that will help us know which choice the user would like to make. Use the Split Based On… widget to help handle that. Drag it onto the Canvas and connect it to the dangling Reply dot from your Send & Wait For Reply widget.
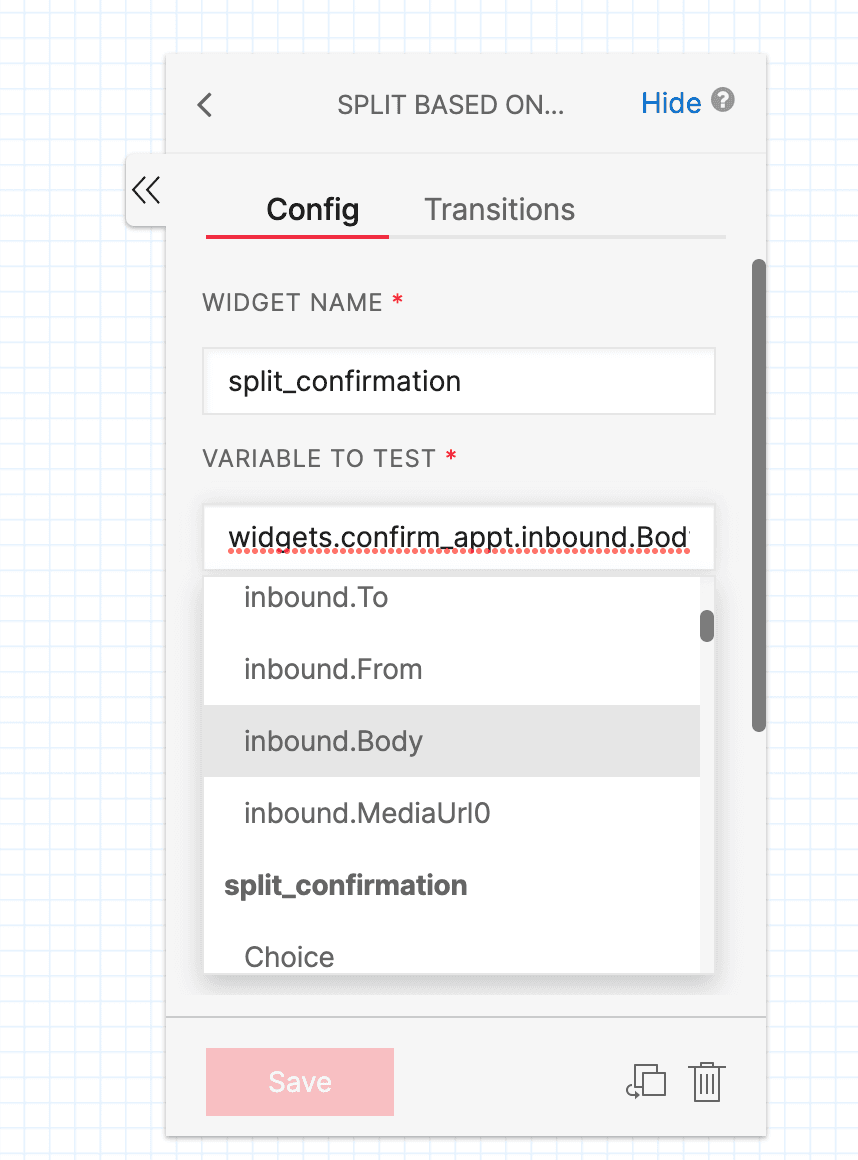
First, you'll need to configure the variable the Split Based On... widget will evaluate. In this case, you are concerned with the user's reply, so select confirm_appt and then inbound.Body from the dropdown in the configuration panel (yours may have a different name if your Send & Wait For Reply widget is not called confirm_appt). This variable represents the incoming response message sent by the user.
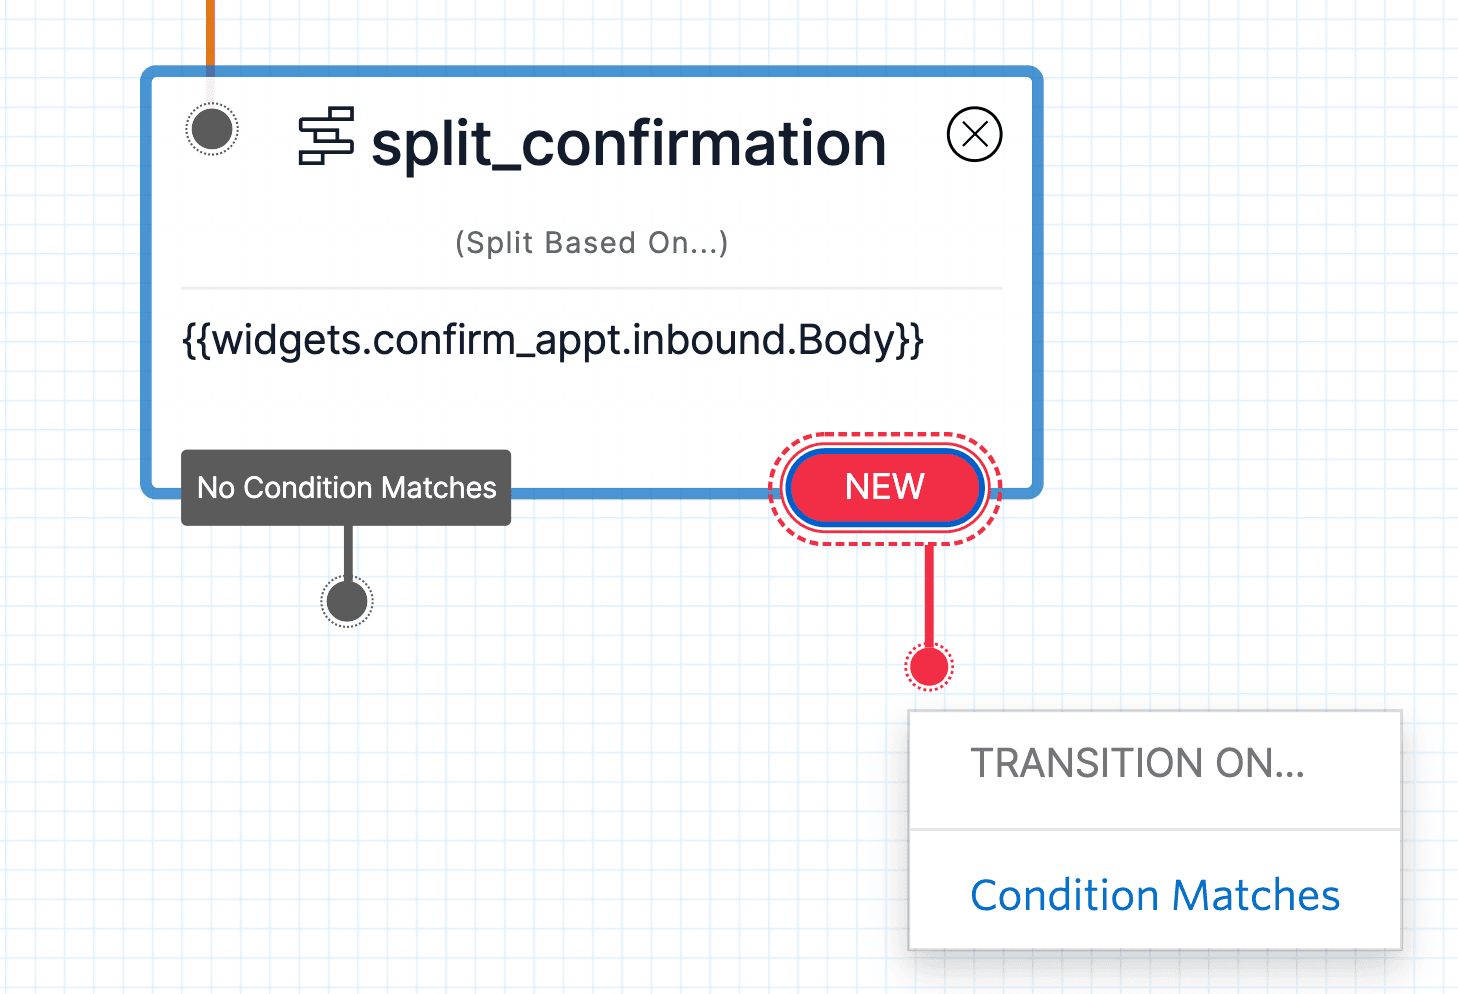
Next, you'll need to declare the choices you're looking for in those text replies — the digits 1 and 2. Click the red New button at the bottom of the Split widget to reveal the Transition On… dropdown menu. Select Condition Matches to create a new condition.
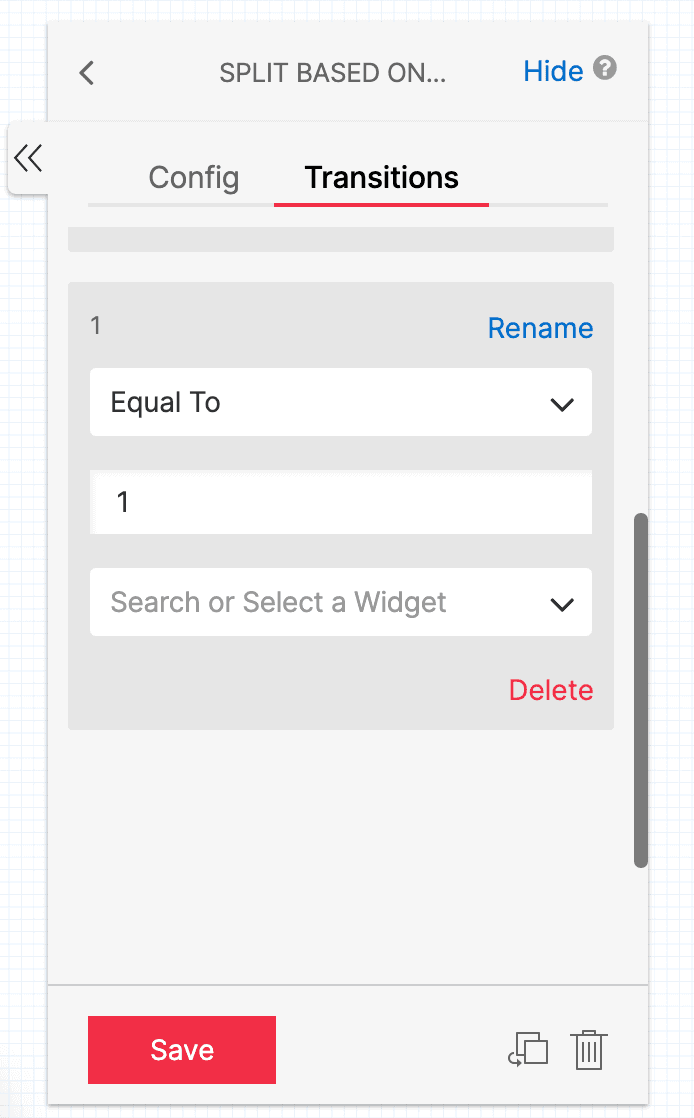
In the right sidebar, find the new condition that you just created, and select Equal To from the dropdown. Set the value to 1 to confirm the appointment. Save the new condition and it will appear on the widget as a transition. Rename the condition to 1.
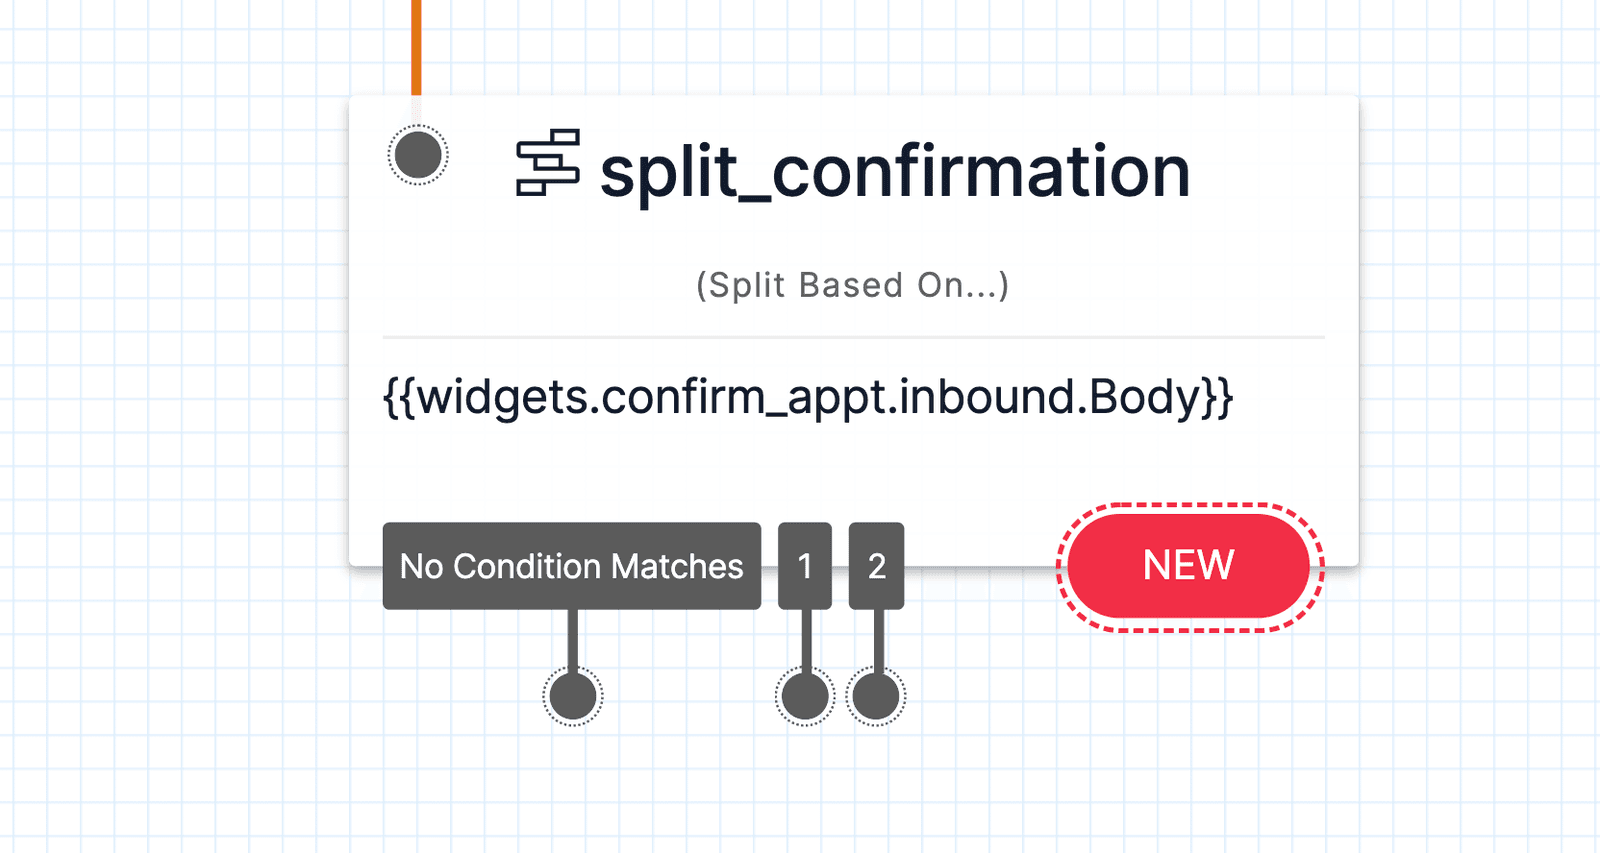
Next, you'll need a condition for if the user has pressed 2 to cancel the appointment. Just as with the first condition, click New on the Split Based On... widget and select Condition Matches. Then set the value equal to 2 in the sidebar, click Save, and rename to 2. Your Split Based On... widget should now have the transitions No Condition Matches, 1, and 2 dangling from the bottom.
Next, you are going to want to handle the appointment confirmation by making a request back to your servers. You can do this by dragging an Make HTTP Request widget onto the Canvas and filling in the required Request Method and Request URL fields in the right sidebar. In this example, http://example.com will be used but you'll want to set the Request URL to the appropriate endpoint for your application. If you'd like to send a request body or parameters, you may set those in the configuration for the Make HTTP Request widget as well.
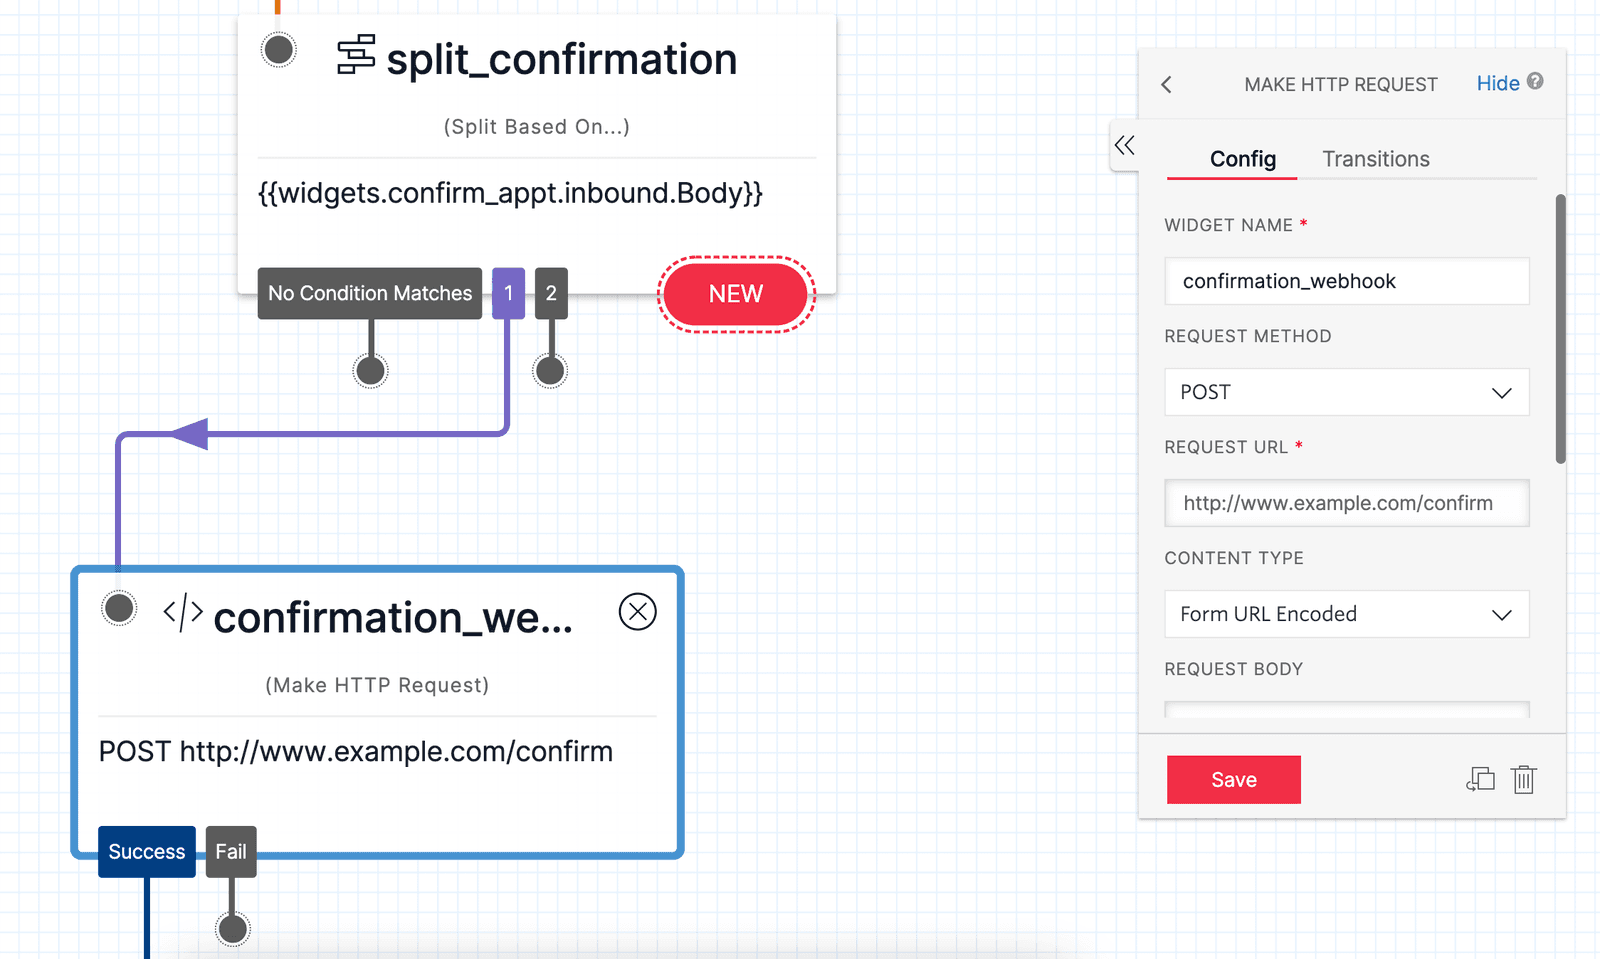
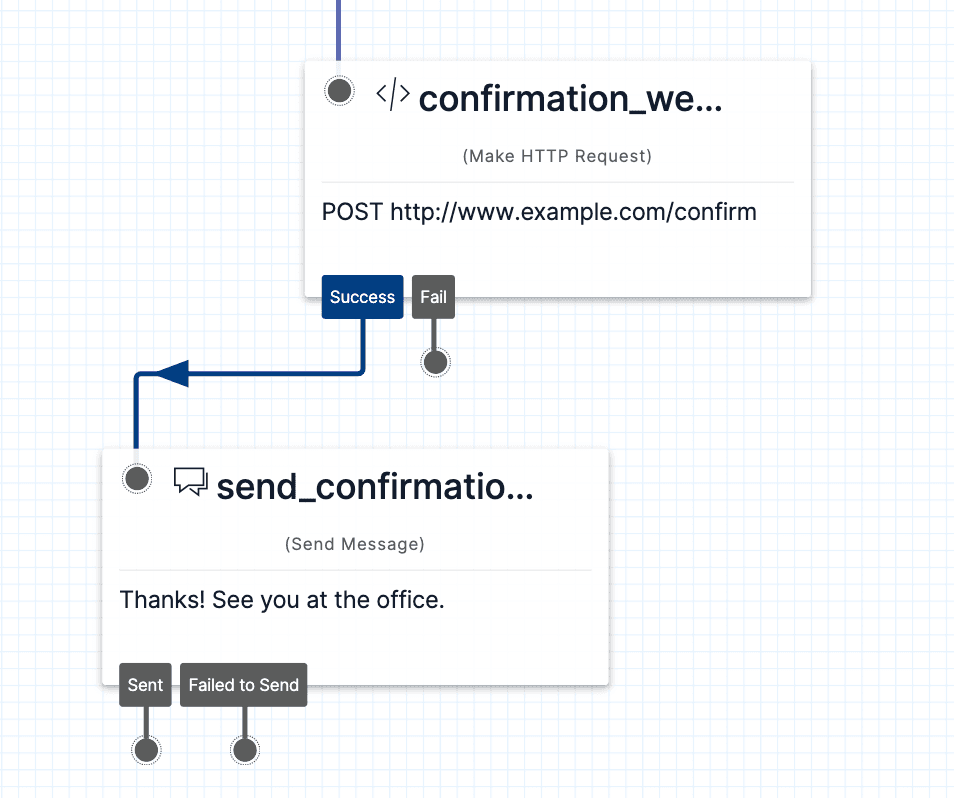
When the request successfully completes, you want to text the user with a thank you. Drag a Send Message widget onto the Canvas and populate the Message Body field with your note for the user.
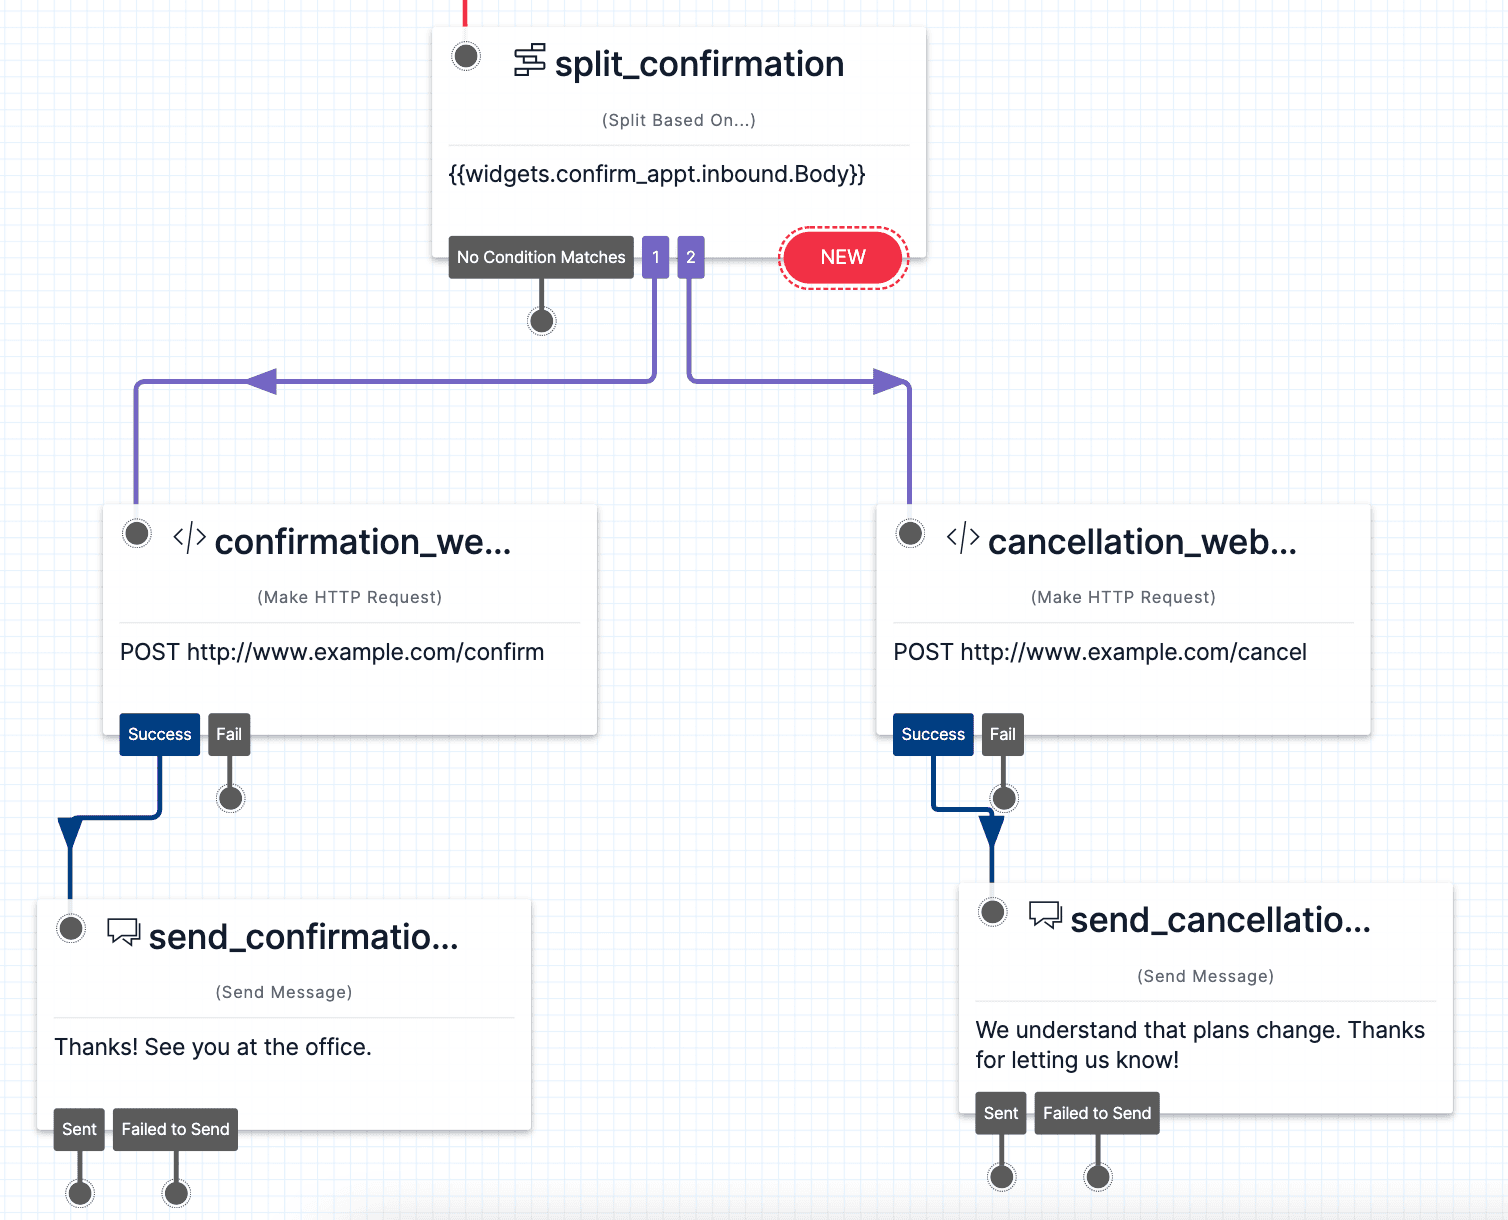
Now it's time to do the same steps over again, but this time for the cancellation. Drag a Make HTTP Request widget onto the Canvas and hook it to the dangling 2 from the Split Based On... widget, make a request to your cancellation endpoint, and send an acknowledgment message to the user.
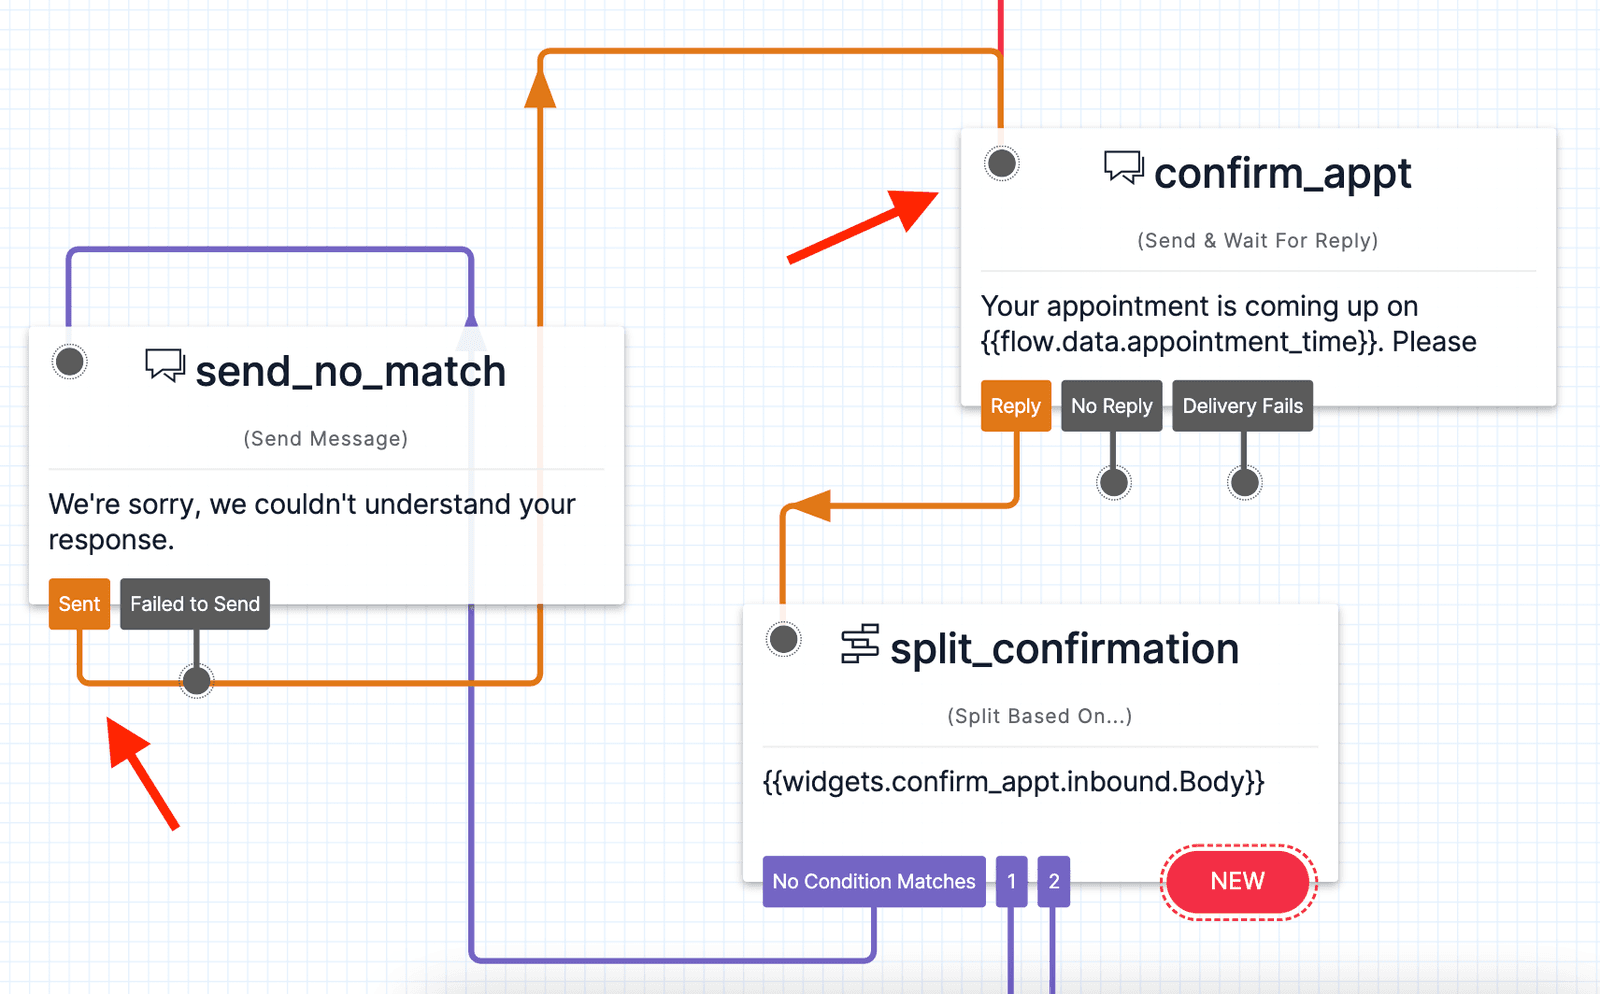
But what if the user enters text besides 1 or 2 (the confirmation and cancellation conditions)? We can take advantage of the built-in No Condition Matches condition and prompt the user with the reminder again. Drag a Send Message widget onto the Canvas and connect it to the No Condition Matches dot, then enter the error message of your choosing. You can then re-prompt the user with the original appointment reminder by dragging the Sent dot on the Send Message widget to the original Send & Wait For Reply widget.
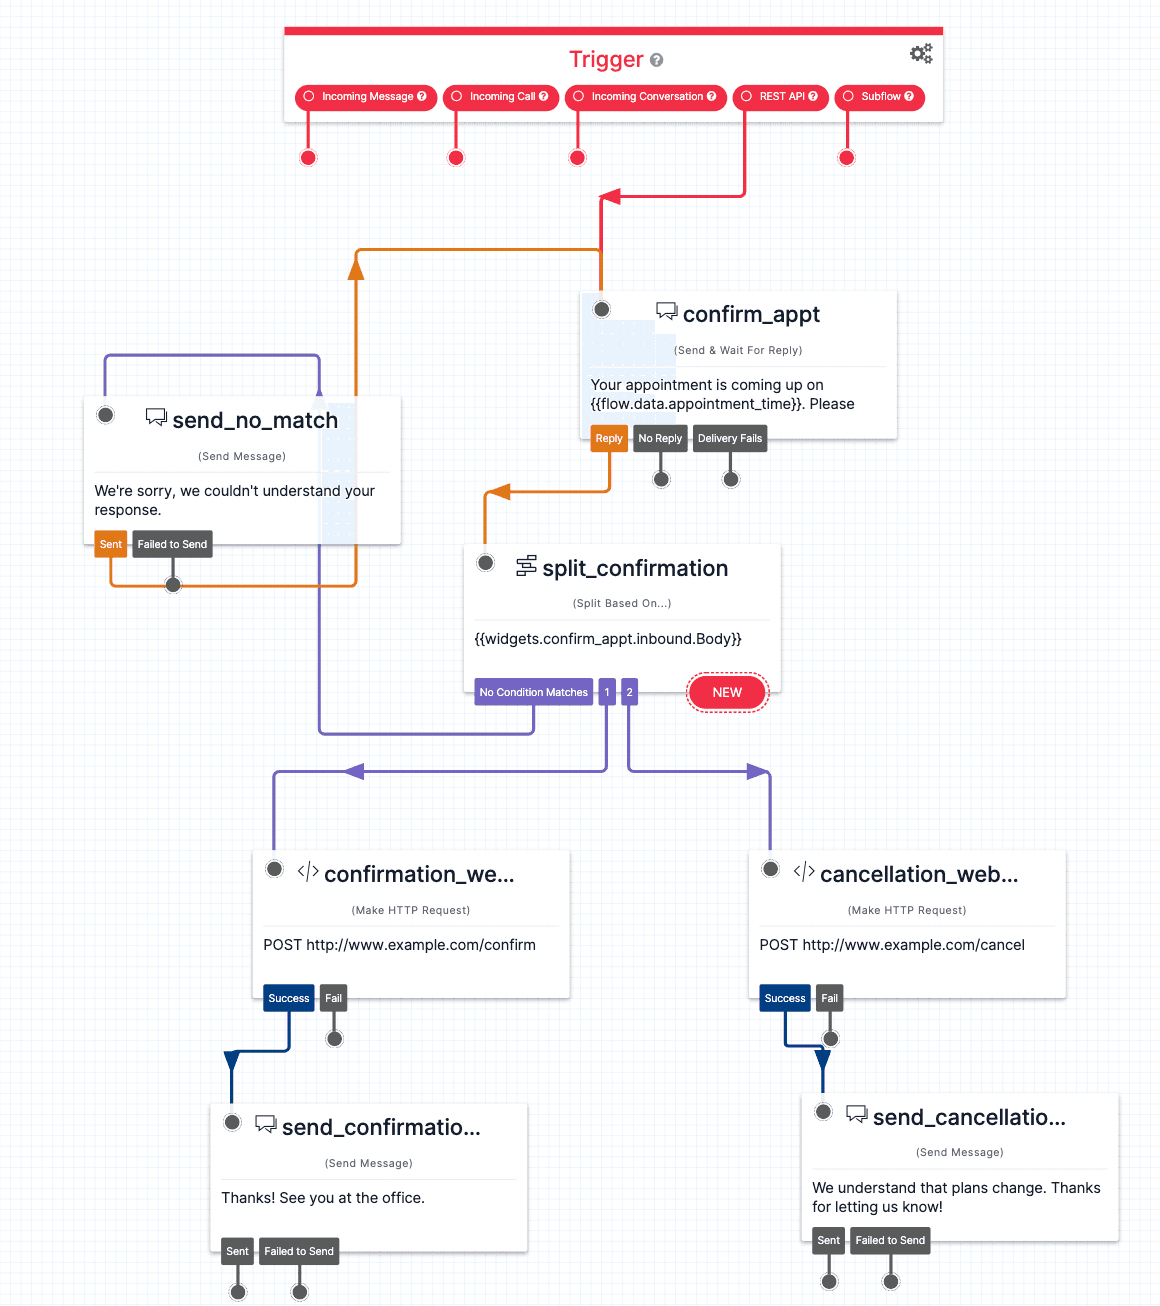
The final state of the Canvas is that a Trigger (Start) widget takes a REST API request, prompts the user to confirm or cancel with a Send & Wait For Reply widget, routes responses through a Split Based On… widget, uses HTTP Request widgets to POST cancellations and confirmations back to your own endpoint, and uses Send Message widgets to acknowledge the user's response.
Time to test it out! You can make a request from your API to Studio and kick off this appointment reminder flow, then text back to confirm or cancel. You can use the following curl command to trigger this flow:
curl -X POST "https://studio.twilio.com/v1/Flows/FWXXXXXXXXXXXXXXXXXXXXXXXXXXXXXXXX/Executions" -d "To=${MY_PHONE_NUMBER}" -d "From=${FROM_NUMBER}" -d "Parameters={\"appointment_time\": \"Tuesday at 6PM\"}" -u $TWILIO_ACCOUNT_SID:$TWILIO_AUTH_TOKEN
For more information about parameters, and other example of curl requests, see the REST API section of the Studio User Guide. Get ready to have your calendar perfectly synced with your clients!