Using Facebook Messenger with Twilio Conversations
In this tutorial, you'll learn how to set up the Facebook Messenger channel in your Twilio account, and how to automatically create new Conversations when someone messages your Facebook page.
Let's get started!
Before you can receive messages from Facebook, you'll need to link your Facebook page to the Messenger channel in the Twilio Console. To set it up, navigate to Channels > Facebook Messenger.

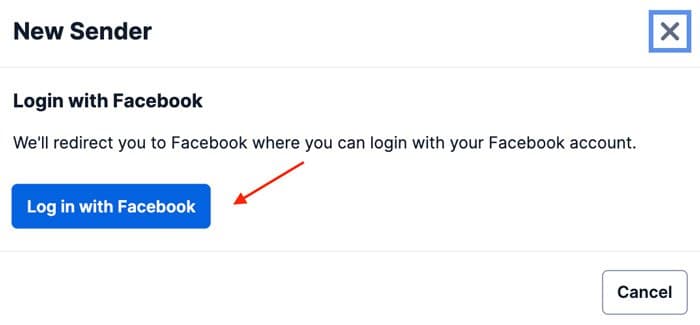
Click New Messenger Sender, then click Log in with Facebook in the modal. A pop-up window will open that will allow you to sign in to your Facebook account.

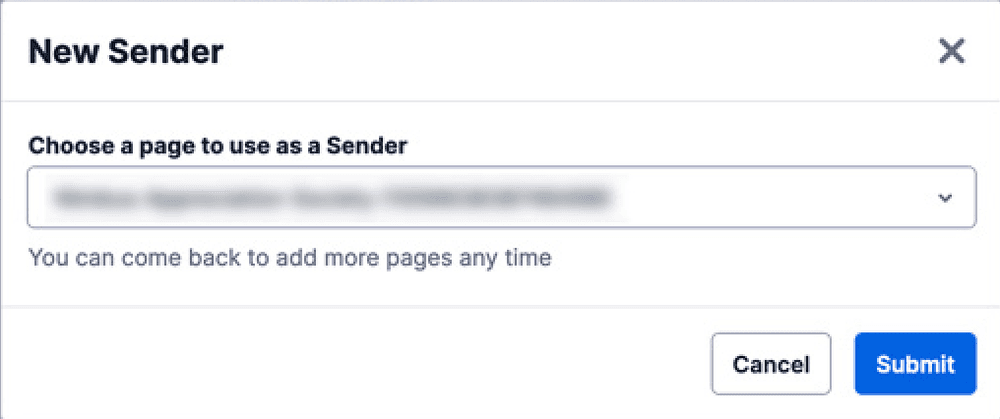
Once you've logged in, your Facebook Pages will be listed. Select the one you'd like to link to your Twilio account and click Submit.

Now, the sender will appear in the main configuration window.

Make a note of the Facebook Messenger Page ID. It's in the middle column (Facebook Page ID) and should be a string of numbers. You will need this later to create a Conversation.
Using Conversations to handle your Messenger communications is very productive. Conversations will maintain distinct threads for each customer and also allows you to receive messages and replies from your channel of choice. You can connect your server-side integration and reply via REST API, connect chatbots or Studio Flows to handle communication in an automated fashion, use our SDK to connect via client-side mobile or web apps, or connect SMS or WhatsApp to receive Messenger chats and reply natively.
To automatically create a new Conversation when a new user messages you on Facebook, you'll need to create a rule using the Address Configuration API. When a message comes into your Facebook page, we'll check to see if there's an existing Conversation with the sender already. If there is, we'll copy the message into the Conversation. If there isn't, and you have autocreation enabled, we'll create a new Conversation and follow any webhook rule you've added using this API.
In this tutorial we'll use the twilio-cli, but you can use the REST API directly or one of our SDKs for Java, Node.js, PHP, Ruby, C#, or Python. Below are several examples of different rules you could create, depending on your workflow. Keep in mind that you'll ultimately only create one Conversations autocreation rule per Facebook page - these examples show different ways that you could choose to handle autocreation.
This example only shows you how to set up autocreation for incoming messages. That won't be particularly useful for most use cases, but it's helpful to see the basic construction of the API request.
1twilio api:conversations:v1:configuration:addresses:create \2--type messenger \3--address messenger:your_messenger_page_id \4--auto-creation.enabled \5--auto-creation.type default6
This rule will:
- Create a new Conversation if one doesn't exist for this page that matches the user who messaged
- Add the user who messaged your page as a Participant
As you can see, this doesn't help you to connect an agent or bot to the person who messaged your page. You can monitor for new Conversations by pointing the global webhook at your server and setting it to send your server onConversationAdded events. Based on that event, you could apply your own business logic to add a Participant or kick off other actions. However, as you'll see in subsequent examples, the Address Configuration API will allow you greater flexibility if you'd like.
Note: Behind the scenes, each of these next examples specifies a Conversation-Scoped Webhook that will be added to each autocreated Conversation.
This example shows you how to enable autocreation and notify a webhook so that you can trigger your business logic. This could be a good starting example for adding an SDK-based Participant or connecting Participants from SMS/WhatsApp.
1twilio api:conversations:v1:configuration:addresses:create \2--type messenger \3--address messenger:your_messenger_page_id \4--auto-creation.enabled \5--auto-creation.type webhook \6--auto-creation.webhook-filters onConversationAdded \7--auto-creation.webhook-url https://your.server.com/webhook \8--auto-creation.webhook-method POST (you can also use GET)9
Your webhook will be notified when a Conversation is autocreated due to this rule and will receive the onConversationAdded payload. You can then add additional logic depending on your goal. For example, you can add another Participant (connect them to a human on another channel like SDK, SMS, or WhatsApp).
This example shows you how to enable autocreation, notify a server-side webhook, and send all subsequent messages to the webhook as they're added. This could be good if you want to reply to the user with the REST API or if you want to connect an external chatbot.
1twilio api:conversations:v1:configuration:addresses:create \2--type messenger \3--address messenger:your_messenger_page_id \4--auto-creation.enabled \5--auto-creation.type webhook \6--auto-creation.webhook-filters onConversationAdded onMessageAdded \7--auto-creation.webhook-url https://your.server.com/webhook \8--auto-creation.webhook-method POST (you can also use GET)9
As you can see, this is quite similar to the last rule. The difference here is the --autocreation.webhook-filtersfield.
We're adding a second event that your server will receive, onMessageAdded. This will contain the body of the message and several other parameters.
From here, you can respond using the Conversations Message API. You could also pass the body to an integration you've written with a third-party service (i.e. Dialogflow or Lex) and then add the response from your integration using the same Conversations Message API.
Tip: You could even use this to integrate with a channel Twilio doesn't support natively, like Slack.
This example shows you how to enable autocreation and connect it to a Studio Flow. Twilio Studio provides you with a visual tool to design interactive customer experiences. You could use this for basic automated handling of incoming chats, or kick off more complex actions using Studio's Run Functionwidget.
Note: You'll need to create a Studio Flow before you can connect it here. Check out our Studio documentation to learn more.
1twilio api:conversations:v1:configuration:addresses:create \2--type messenger \3--address messenger:your_messenger_page_id \4--auto-creation.enabled \5--auto-creation.type studio \6--auto-creation.studio-flow-sid FWXXXXXXXXXXXXX
Any Conversations autocreated with this rule will be connected to your Studio Flow. This can be a great way to filter incoming chats with some basic handling. You could even gather an issue type from the customer and add the appropriate agent to the Conversation using that information and Studio's Run Function widget.
Congratulations on handling inbound Messenger chats! Continue learning more about Conversations with the following resources: