Explore the Built-In Flex UI Views
Now that you've set up your Flex account, you can start exploring the Flex UI. As a reminder, you can log into the Flex UI at flex.twilio.com.
There are four main views in the built-in Flex UI:
- Admin Dashboard
- Agent Desktop View
- Teams View
- Queues View
This section outlines each view and its purpose. To navigate through the different views, you can click on the icons on the left side of the Flex UI.
For more information about these views, you can check out the article Core Concepts: Flex UI.
Once you have familiarized yourself with these views, you can handle your first incoming call and SMS tasks, covered in the next section of this guide.
Info
This walkthrough is from the perspective of a Flex Administrator. Supervisors cannot view the Admin Dashboard, and Agents can only interact with the Agent Desktop view to handle interactions with end-users. Learn more about different user roles in the previous section of the Onboarding Guide.
Info
When you open the Flex UI for the first time, you might see a popup in your browser asking you to accept notifications from the web application. You should accept this so that the browser can send you notifications for incoming calls and texts.
You can add additional views later with plugins if you choose to customize your Flex UI beyond the out-of-the-box configuration.
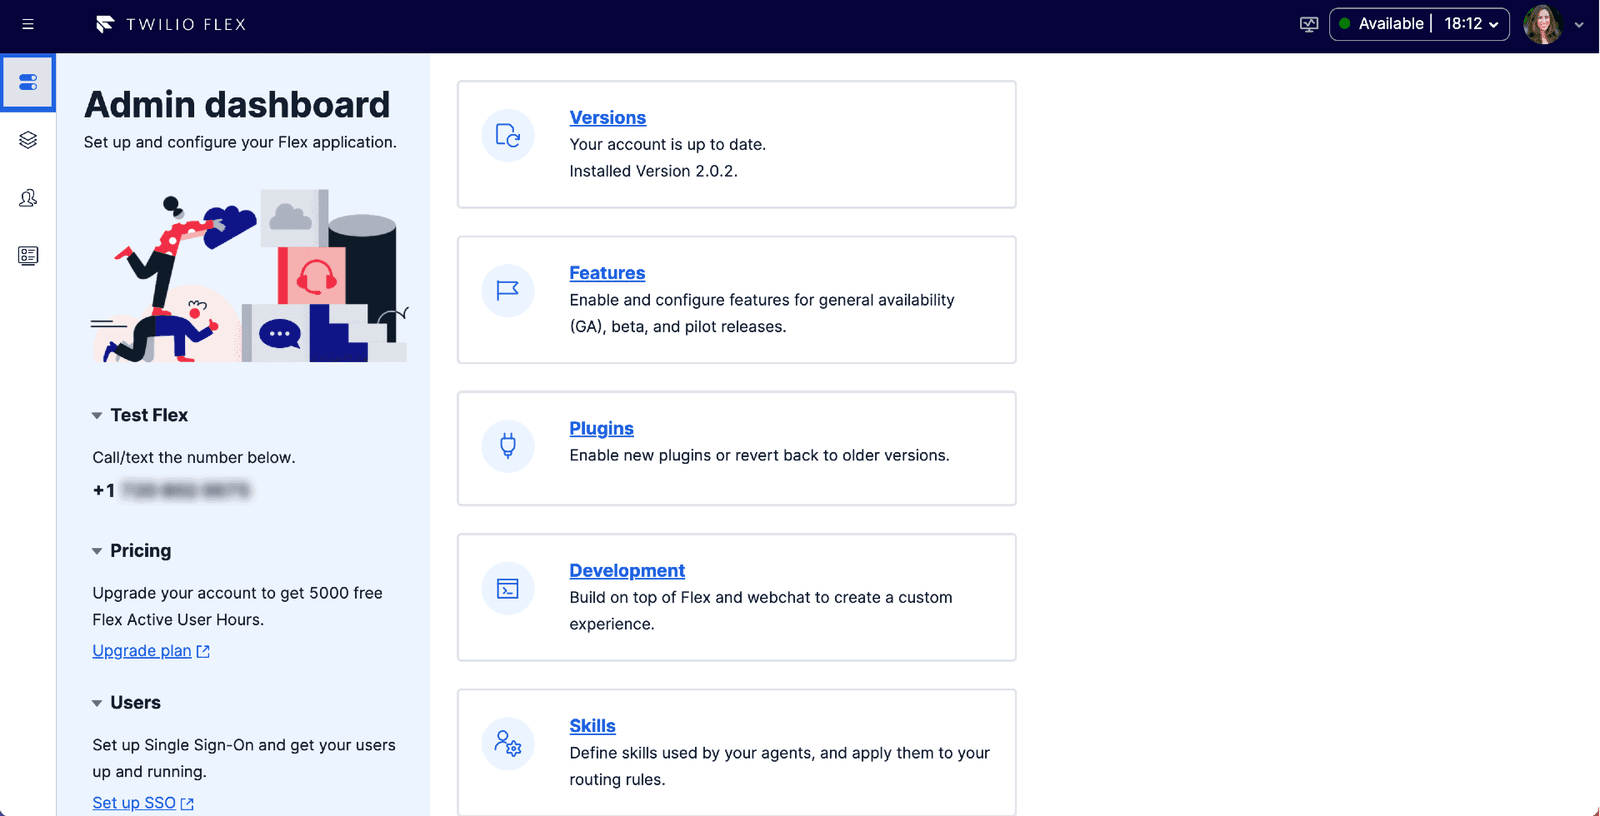
The Admin Dashboard is the first view you see when you log in to your Flex project as an Administrator. Here, you can see your provisioned phone number and configure certain aspects of your project. For example, you can edit the Service Level Objectives (SLOs) for your Queues, set up Customer Relationship Management (CRM) integrations for Salesforce and Zendesk, create new Skills for categorizing Agents, and enable or disable Flex features that are generally available, in private beta, and in pilot phase.
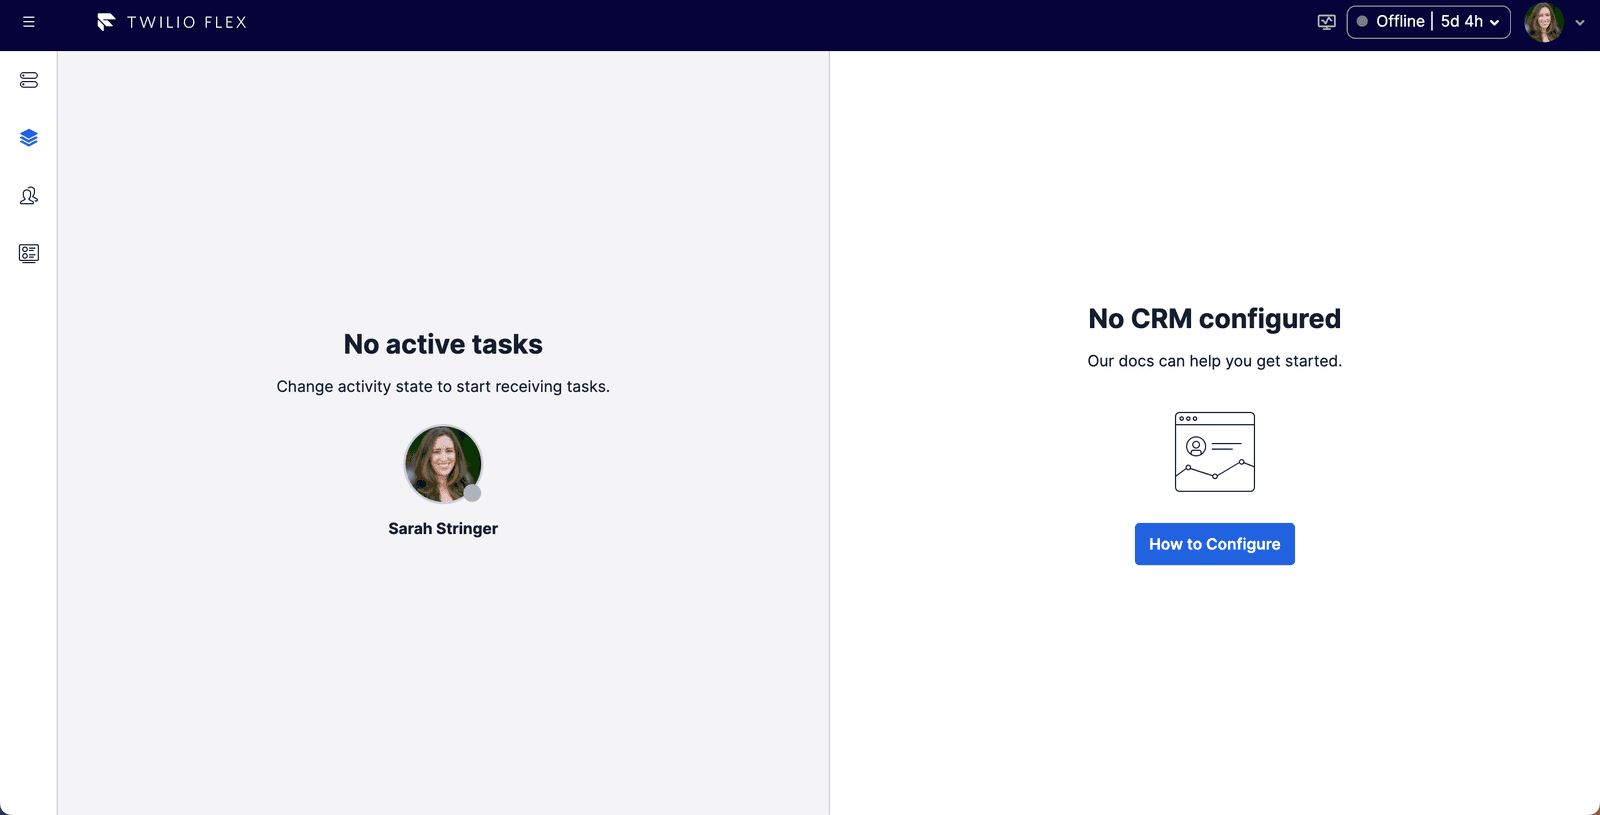
In the Agent Desktop View, you see incoming, active, and wrap-up tasks that you are working on as an Agent. This is the primary view for an Agent without Administrator privileges, but Administrators can also act as Agents and interact with this view.
When you first create your account and go to the Agent view, there are no active tasks and there is no configured CRM.
Salesforce and Zendesk are both natively supported in Flex and you can integrate with them under Integrations in the Admin View. You can also add non-natively supported CRMs to Flex using plugins. When you integrate your CRM with Flex, an Agent can see a side-by-side view of customer details when they are engaging with that customer.
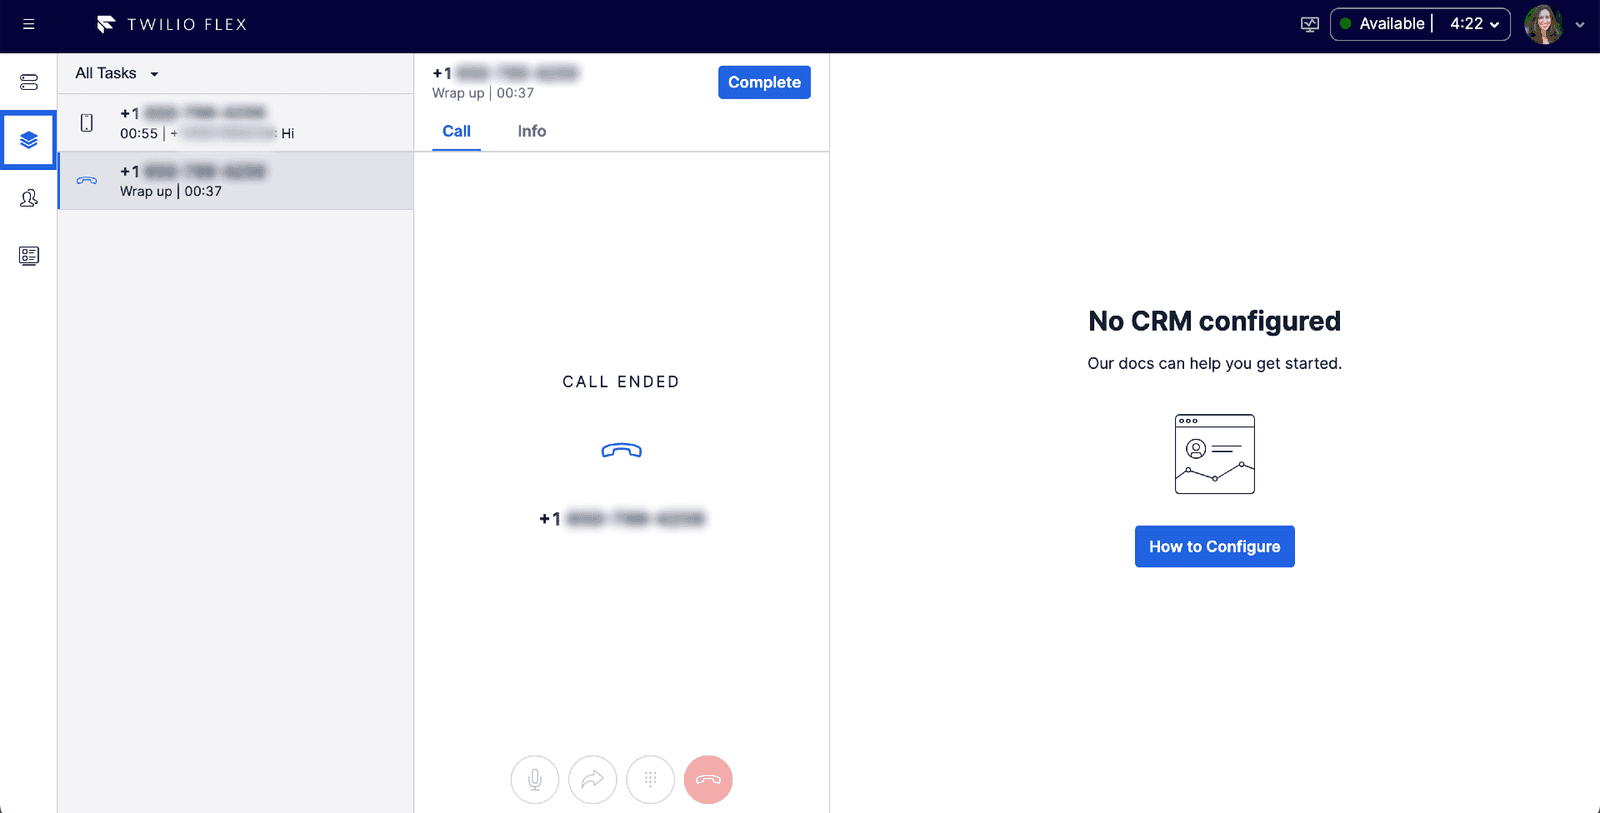
When an Agent has an active task, the Agents View displays the possible interactions with that Task. An Agent can also have multiple active SMS tasks and a single active Call task and switch between them in the Agents View.
The Teams View is available for Admin and Supervisor roles. Here, you can see in real time what other people in your Flex project are doing.
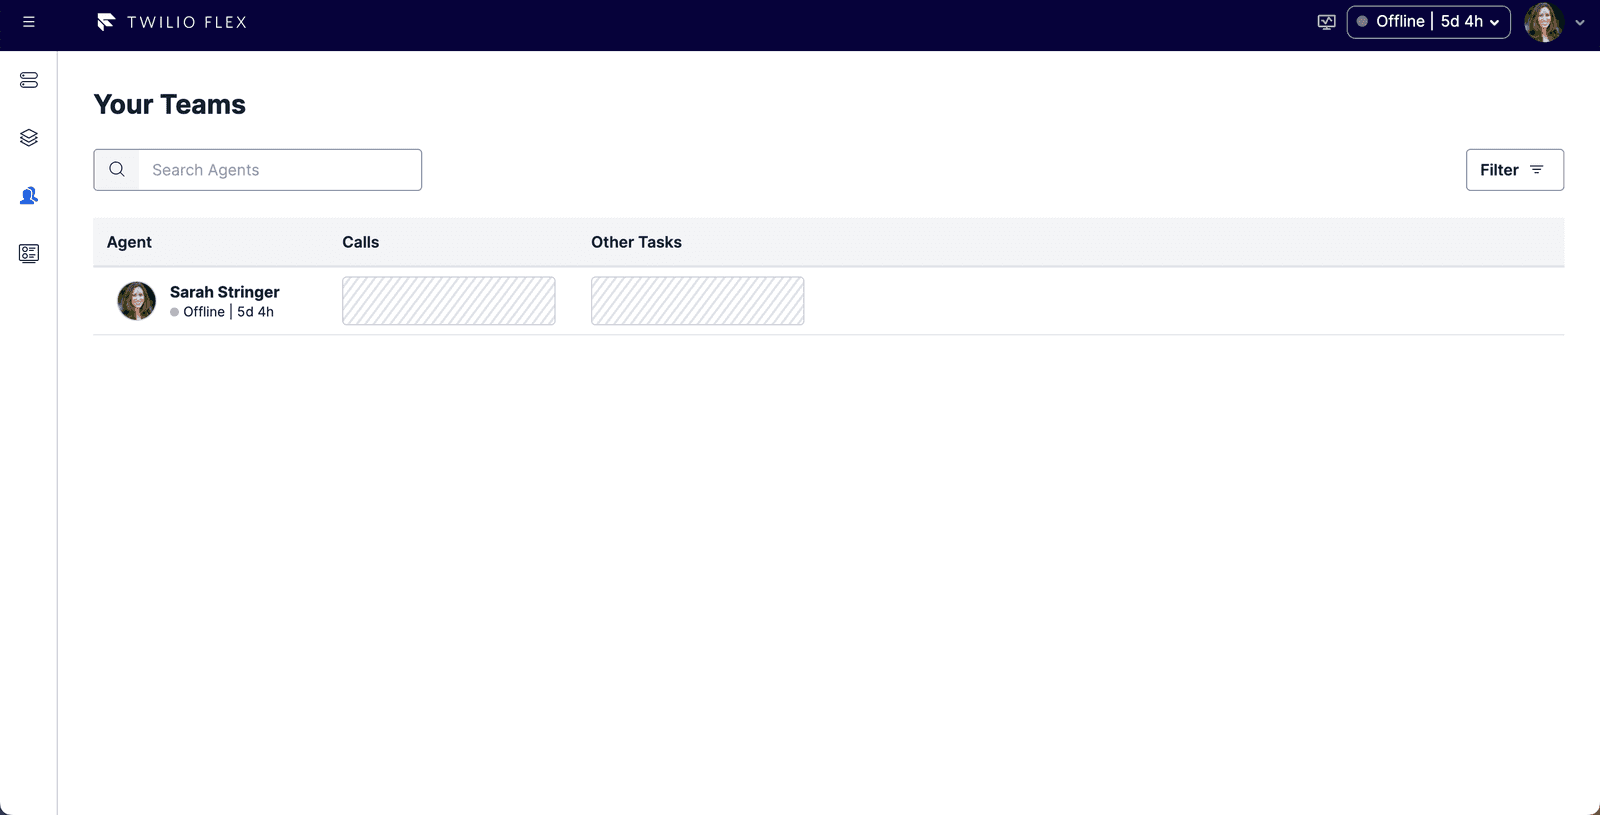
The Teams View can display up to 200 Agents at a time. You can filter the list of Agents in the view. When you initially create your account, you only see yourself as an Agent as there are no other users in the account.
When an Agent is on a phone call or handling SMS tasks, information about those tasks show up here. As an Admin or Supervisor, you can listen in to live calls or text conversations by clicking on the tasks listed under an Agent's Calls and Other Tasks.
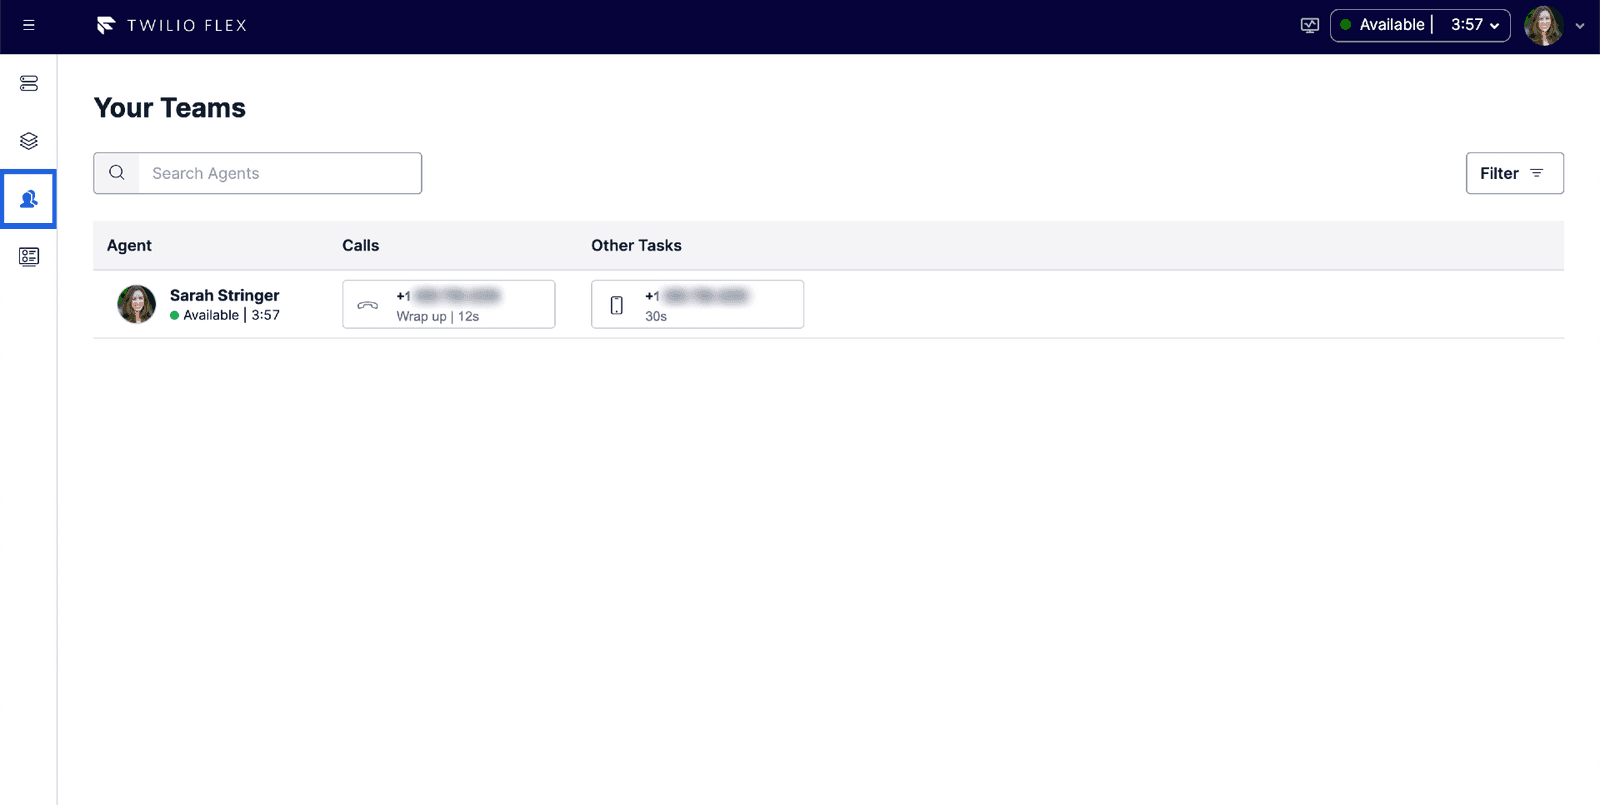
You can also assign Agents Skills in this view, which you will learn about when configuring skill-based routing later in this Onboarding Guide.
Learn more about the Teams View capabilities in the Monitor Agent Activities article.
In the Queues View, you can see a roll-up of each Task Queue for your account. This view is available for Admin and Supervisor roles.
The first time you look at the Queues View, before you have received any inbound calls or SMS messages, it will show that there is no data to display.
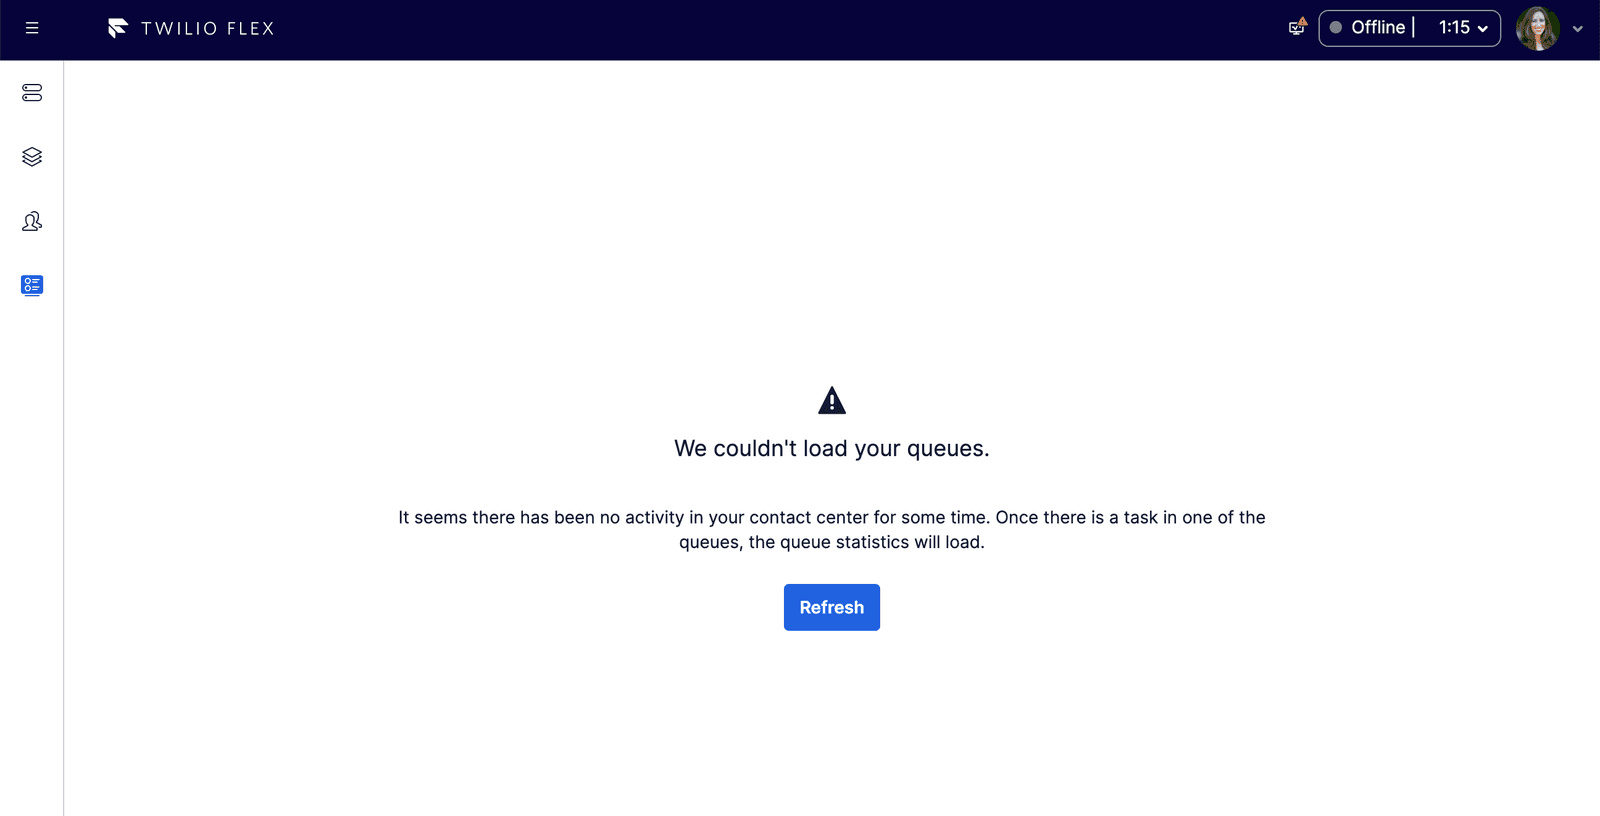
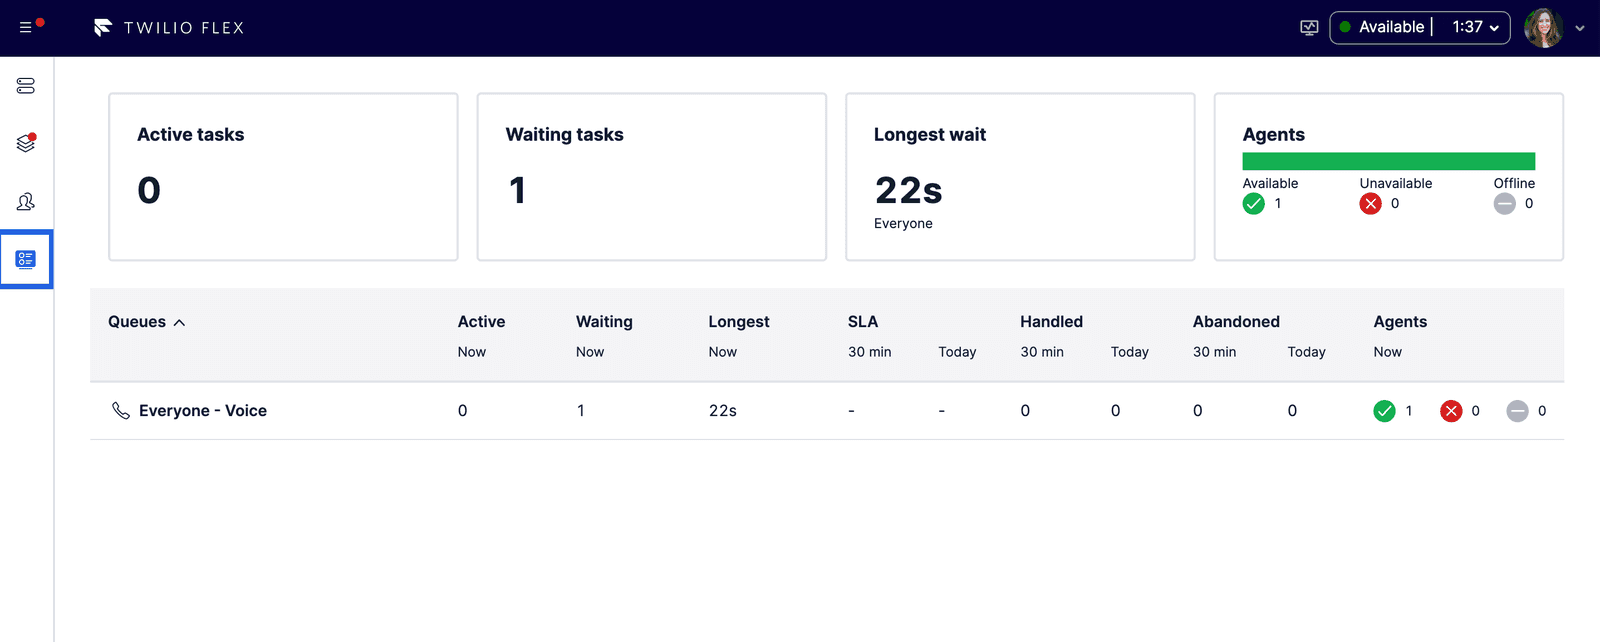
After you start handling Tasks, this page will display statistics about your Queues.
When you create a new Flex account, you only have one Queue, called Everyone. All calls and text messages go to this Queue. When a voice caller is in a Queue, they hear default waiting music until an Agent accepts the call.
When one or more Tasks are waiting in a Queue, you can see details about waiting tasks and the number of available, unavailable, and offline Agents.
You can set up new Queues from the Twilio Console. This guide includes instructions for creating your first Queues in the Configure Skill-Based Routing section. You can also learn more about the Queues View in the Real-Time Queues View documentation.
