Setting up a TaskRouter Workspace: Add and Configure a Workflow
With your Workspace open in the TaskRouter console, click 'Workflows' then 'Create Workflow'. Name the new Workflow 'Incoming Customer Care Requests'.
Every time you add a Task to TaskRouter, you will associate it with a Workflow. A Workflow examines the attributes of each incoming Task and adds it to the appropriate Task Queue. It also controls timeouts and escalations between TaskQueues - a concept not addressed in this Quickstart tutorial.
For now, in the Assignment Callback URL field, enter http://example.org as a placeholder. In Part 2, we will set up a server to handle Task assignment callbacks, and we'll replace this value with the address of our new server.

To make things easier for ourselves in Part 2, set a high value for "Task Reservation Timeout" - e.g. 1200 seconds. We'll be accepting Reservations manually, and having them time out will be frustrating.
In Part 3, we'll use key presses to capture a phone caller's language preference and use that information to route to the best Worker. To do that, we'll need a Task attribute to represent the caller's language selection. We can name Task attributes whatever we want, but it seems reasonable to use selected_language.
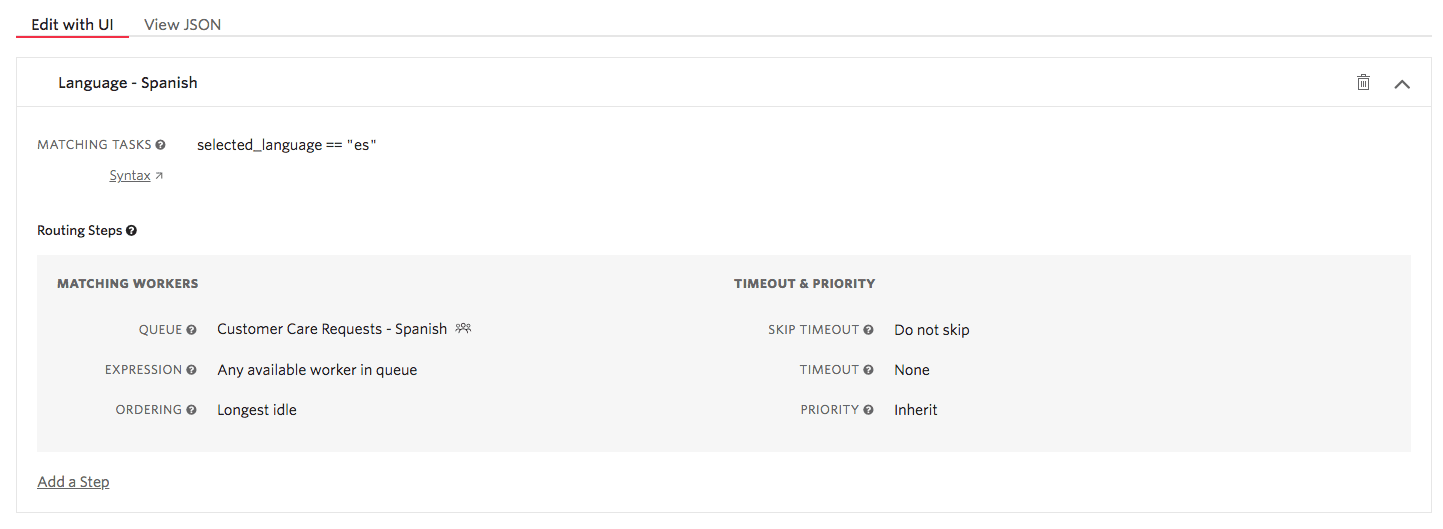
Add two Routing Configuration filters to the Workflow. These will route new Tasks into the Task Queues we created earlier based on the value of selected_language.
The first Routing Configuration targets Tasks where the caller selected Spanish. It adds incoming Tasks to the 'Customer Care Requests - Spanish' Task Queue.
Routing Configuration Expression: selected_language == "es"

Use the 'Add a filter' link to add your second Workflow filter.
Routing Configuration Expression: selected_language == "en"

Set the default Task Queue to 'None' before saving the Workflow:

We're just about done setting up! But before we start adding Tasks to our Workspace, we need to understand the role of Activities.