Creating Tasks and Accepting Reservations: Accept a Reservation using the REST API
To indicate that a Worker has accepted or rejected a Task, you make an HTTP
POST request to a Reservation instance resource. To do that, we need the
TaskSid, which is available via the web portal, and the ReservationSid. The
ReservationSid was passed to our Assignment Callback URL when a Worker was
reserved for our Task. Using the ngrok inspector page at
http://localhost:4040, we can easily find the request parameters sent from
TaskRouter and copy the ReservationSid to our clipboard. **
Info
The Reservation API resource is ephemeral and exists only within the context of a Task. As such, it doesn't have its own primary API resource and you'll find it documented in the Tasks resource section of the reference documentation.
With our trusty TaskSid and ReservationSid in hand, let's make another REST API request to accept our Task Reservation. Create a PHP file called 'accept-reservation.php' and place the below code into it. Remember to substitute your own account details in the appropriate variables.
1<?php2// Get the Twilio-PHP library from twilio.com/docs/libraries/php,3// following the instructions to install it with Composer.4require_once "vendor/autoload.php";5use Twilio\Rest\Client;67// put your Twilio API credentials here8// To set up environmental variables, see https://twil.io/secure9$accountSid = getenv('TWILIO_ACCOUNT_SID');10$authToken = getenv('TWILIO_AUTH_TOKEN');1112$workspaceSid = 'WSXXXXXXXXXXXXXXXXXXXXXXXXXXXXXXXX';13$taskSid = 'WTXXXXXXXXXXXXXXXXXXXXXXXXXXXXXXXX';14$reservationSid = 'WRXXXXXXXXXXXXXXXXXXXXXXXXXXXXXXXX';1516// instantiate a new Twilio Rest Client17$client = new Client($accountSid, $authToken);1819// update the reservation20$client->taskrouter21->workspaces($workspaceSid)22->tasks($taskSid)23->reservations($reservationSid)24->update(['reservationStatus' => 'accepted']);
If you'd like to use curl instead, put the following into your terminal:
1curl https://taskrouter.twilio.com/v1/Workspaces/{WorkspaceSid}/Tasks/{TaskSid}/Reservations/{ReservationSid} \2-d ReservationStatus=accepted \3-u {AccountSid}:{AuthToken}
Examining the response from TaskRouter, we see that the Task Reservation has been accepted, and the Task has been assigned to the Worker Alice:
{... "worker_name": "Alice", "reservation_status": "accepted", ...}
If you don't see this, it's possible that your Reservation has timed out. If this is the case, set your Worker back to an available Activity state and create another Task. To prevent this occurring, you can increase the 'Task Reservation Timeout' value in your Workflow configuration.
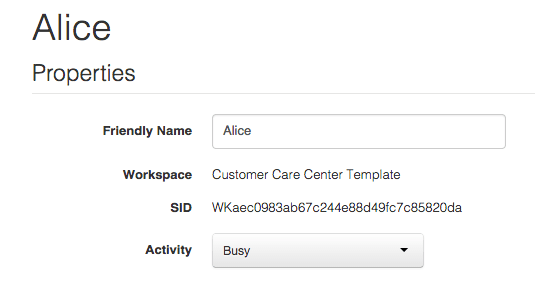
With your Workspace open in the TaskRouter web portal, click 'Workers' and you'll see that Alice has been transitioned to the 'Assignment Activity' of the TaskQueue that assigned the Task. In this case, "Busy":

Hurrah! We've made it to the end of the Task lifecycle:
Task Created → eligible Worker becomes available → Worker reserved → Reservation accepted → Task assigned to Worker.
In the next steps, we'll examine more ways to perform common Task acceptance and rejection workflows.
Next: Accept a Reservation using Assignment Instructions »
** If you're not using ngrok or a similar tool, you can modify assignment.php to print the value of ReservationSid to your web server log. Or, you can use the Tasks REST API instance resource to look up the ReservationSid based on the TaskSid.