Managed users
Individuals whose logins are owned and overseen by an organization are called Managed Users. The organization has full control over the lifecycle and settings of its managed users. When we refer to 'users', we're referring to those individuals' records in the system.
Adding users to your organization, thereby making them managed users, means that you can supervise them centrally. They can be managed by an Organization Owner or Administrator, who will have full control over the user's lifecycle and can delete users, change their name, assign them to accounts, reset their passwords — forcing them to create a new one — or require that they use two-factor authentication when signing in.
To create a managed user, an Organization Owner or Organization Administrator can navigate to the User management page or the legacy Console's Users section, click the Invite User button, and enter the user's email address.
If there's no user associated with the email address, Twilio will create a new user in the system. By default, this is a managed user.
If the invited user does exist in the system, Twilio will send an invitation to the user. Once they have accepted the invitation, the user will join the organization as a managed user.
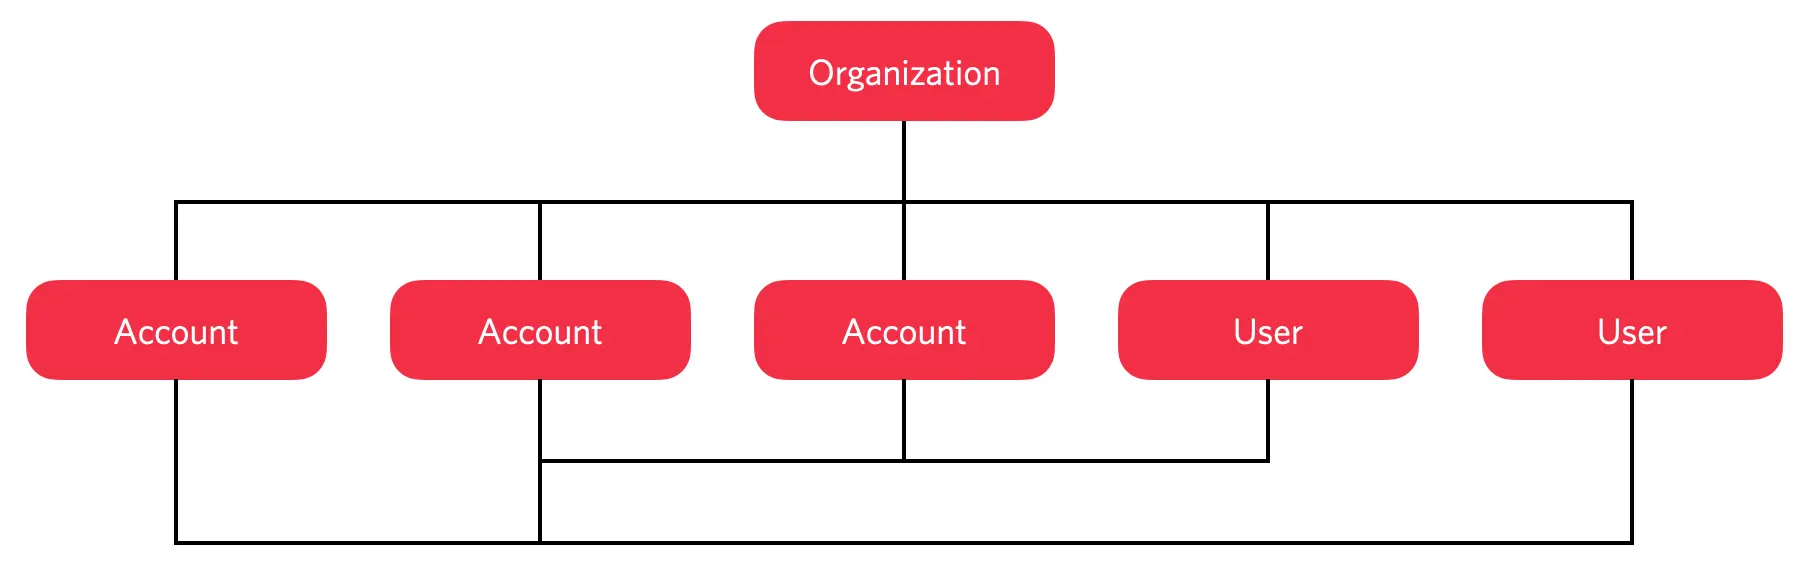
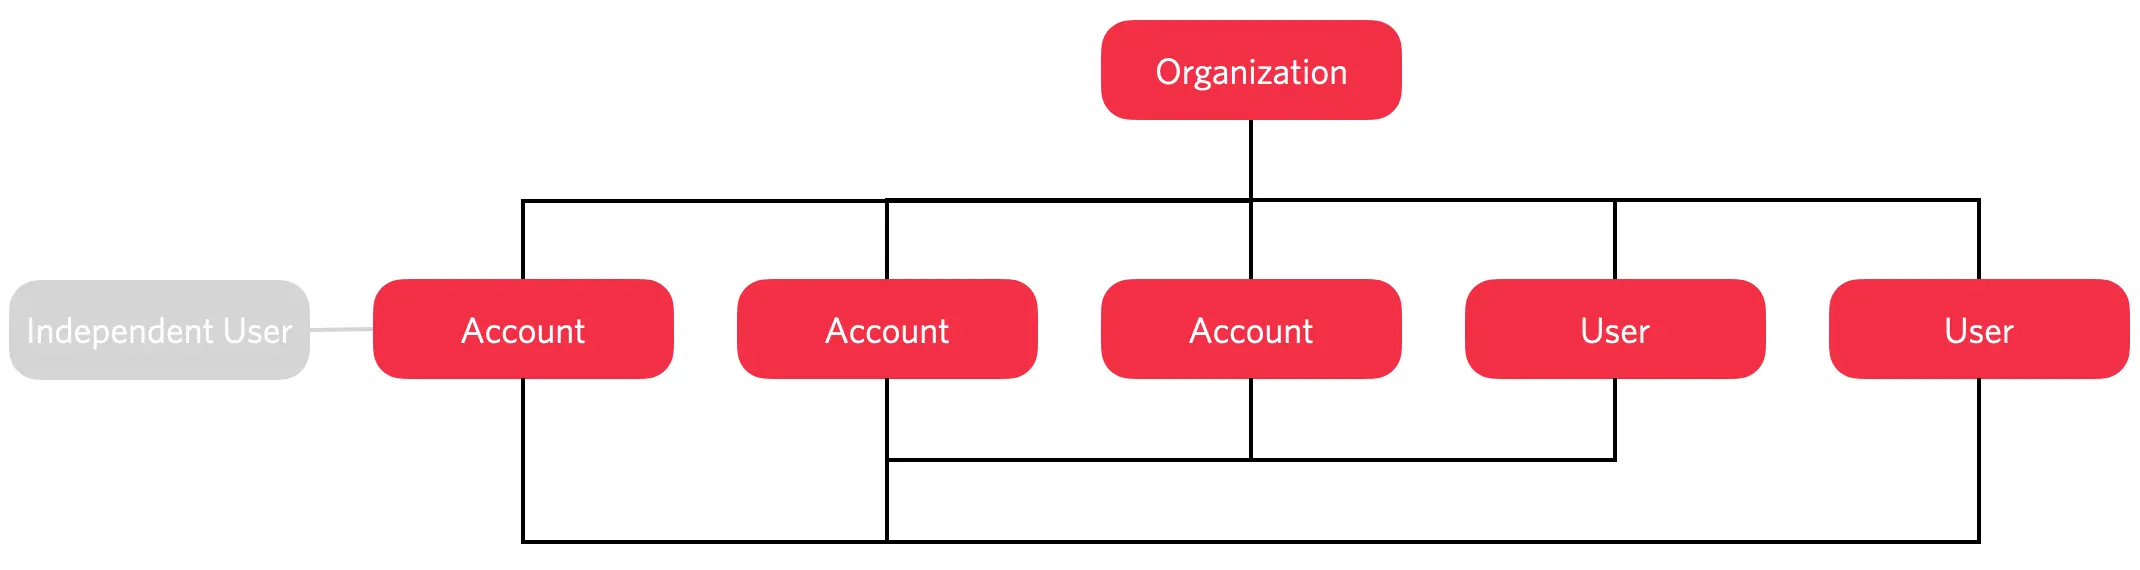
Managed users belong to an organization. An external user exists outside of an organization but has access to one or more of the organization's managed accounts. For example, you might want to add a contractor so that they can access the account they have been hired to build. Rather than add external users to your organization as you would manage users, you instead add them to the specific account(s) you want them to access.
To view your organization's external users:
In Twilio Console, navigate to Settings > Organization settings > User management and click the External tab.
Info
To learn more about how organizations wrangle accounts, and the different types of accounts available, see Managed Accounts.
Users who have been invited to join an organization but have yet to respond are called "invited users." You can choose to prompt folks taking too long to confirm their acceptance of your invitation by resending the invite.
To view your organization's invited users:
In Twilio Console, navigate to Settings > Organization settings > User management and click the Invited tab.
To invite a user, you must first have verified the domain that owns the user's email address on the Domains page or in the legacy Console's Domains section. If they are not part of your company — i.e., their email address is not in a domain you own — then you invite them in a different way.
To learn more about how an organization connects to its company's Internet domain, see Domains.
- Log in to Twilio Console and navigate to Settings > Organization settings > User management.
- Click Invite User.
- Select the accounts to invite users to and roles for the users, then click Next.
- Enter the email addresses for the people you want to invite, then click Next.
The users will appear under the Invited tab until they accept the invitation.
Warning
This feature isn't enabled for all organizations. If you don't see this feature for your organization, contact Twilio support.
You can bulk import existing Twilio users belonging to your verified domain into your organization on the User management page.
- Log in to Twilio Console and navigate to Settings > Organization settings > User management.
- Click Imported.
- Click Import users and follow the instructions.
- Log in to Twilio Console and navigate to Settings > Account settings > User management.
The User access page opens. - Click Invite users.
- Enter the email addresses for the users you want to invite.
- Select the roles for each user, then confirm the invitation.
If the user is already part of your organization, they will be given access to the selected account according to the role you chose. If they are not yet part of your organization, they will be sent an email invitation — just like creating the user from scratch, as outlined above.
Info
Account roles are not exclusive. For example, a user can be assigned both the Developer and Billing Manager roles. Because the Administrator role has the same permissions as both of these roles, if you tick the Administrator box, the others will be de-selected. You find out more about account roles in this support document.
This action will remove a user's access to your organization and all managed accounts while leaving their user active. They can continue to log into Twilio and access accounts not managed by your organization, but can be invited to the organization and/or other managed accounts in the future.
- Log in to the Console and navigate to Twilio Admin > Users.
- Click on the name of the user you are managing.
- Click on the Remove user option at the bottom of the page
- Check I have reviewed and acknowledge the points above to acknowledge:
- This user will be removed from the Organization.
- This user will lose access to all managed accounts.
- The user will lose access to any role granted by the Organization.
- Access to managed accounts can still be granted in the future.
- The Organization will no longer be able to control the lifecycle or setting of the user.
- Choose the owner of the account(s).
- Click on the Remove User button.
You can select the same user as the owner of the accounts but the organization will no longer be able to control the lifecycle or setting of the account(s). If you want to keep the account under the organization's control, select a new user who is a managed user of the organization.
This action will immediately delete and remove the user from Twilio's system, but not the accounts they own or have access to. They can create a new user for that email again in the future, but will not have access to the accounts they were previously invited to.
- Log in to the Console and navigate to Twilio Admin > Users.
- Click on the name of the user you are managing.
- Click on the Delete User option at the bottom of the page
- Review and check off all acknowledgements on the Delete User pop-up screen.
- Choose the owner of the account(s).
- Click on the Delete User button.